1. How to Update a Test Case
- Hover over the test case you want to update.
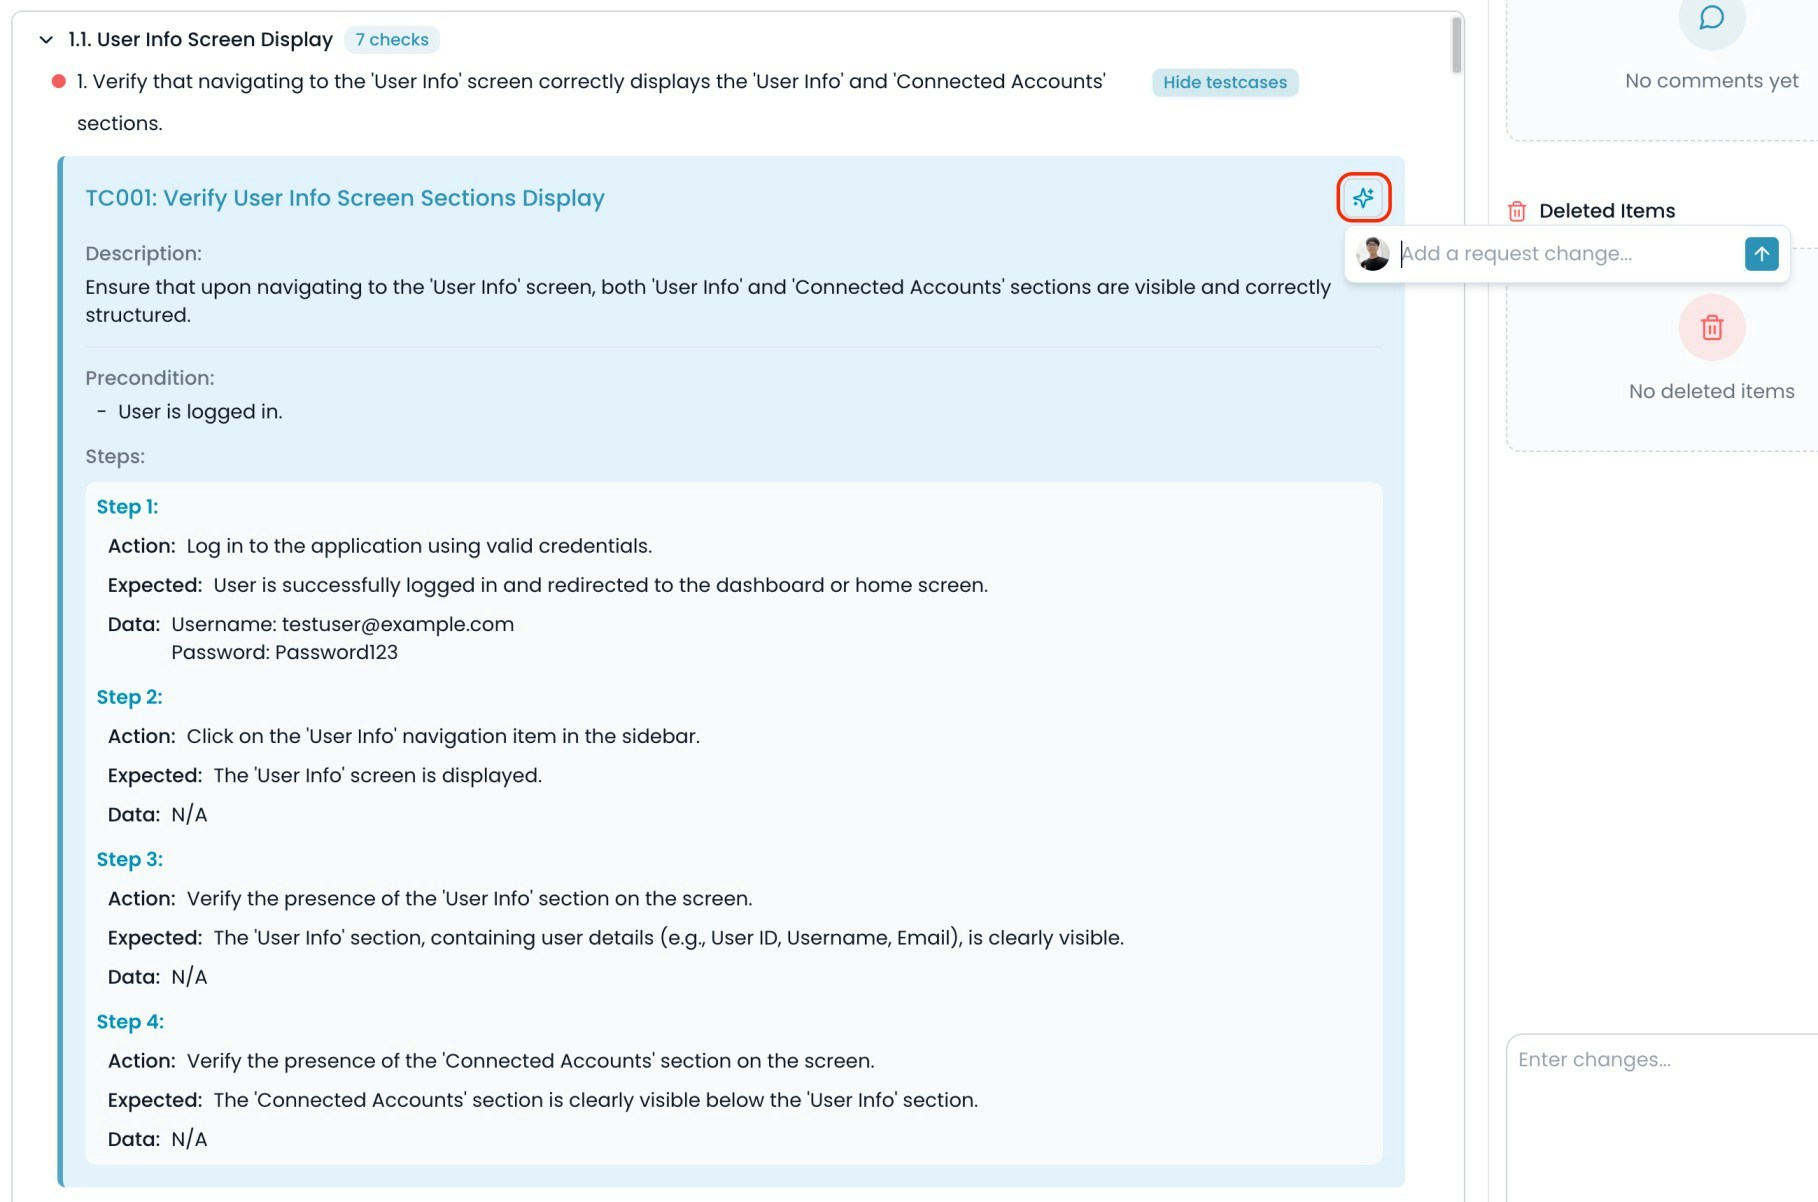
- Click the Update Test Case icon.
- An input box labeled “Add a request change…” will appear.
- Enter your change request — describe exactly how you want the test case to be updated.
- Click the up arrow icon to send your request to the AI.
2. What Happens Next?
- The AI will analyze your request and update the selected test case according to your instructions.
- The updated test case will replace the previous test case.
- Only the selected test case is changed; this action does not create a new version of the overall checklist or test cases.
3. Change History
- Every update to a test case is recorded in the Timeline tab, so you can always review what changes were made, when, and by whom.
