Steps to Create Test Cases
1. Prepare Your Project
Make sure you have already created a project and configured your test case preferences (test case types, desired detail level, etc.).Create project
Create a project to manage features & test cases
Modules
Create the folder to manage epic or multiple features
2. Open the Test Case Generator
- In the sidebar, click + New Test Cases to open the test case creation screen.
3. Input Feature Requirements
You can enter your requirements in various formats:- Text input:
Paste or type use cases, user stories, business rules, user flows, etc. - File upload:
Upload up to 10 files (.pdf, .txt, images, etc.) to provide specifications, wireframes, or screenshots.

4. Click “Create TCs”
- Optionally, select the language for your test cases if prompted.
- Click the Create TCs button to let AI process your requirements and propose checklist.
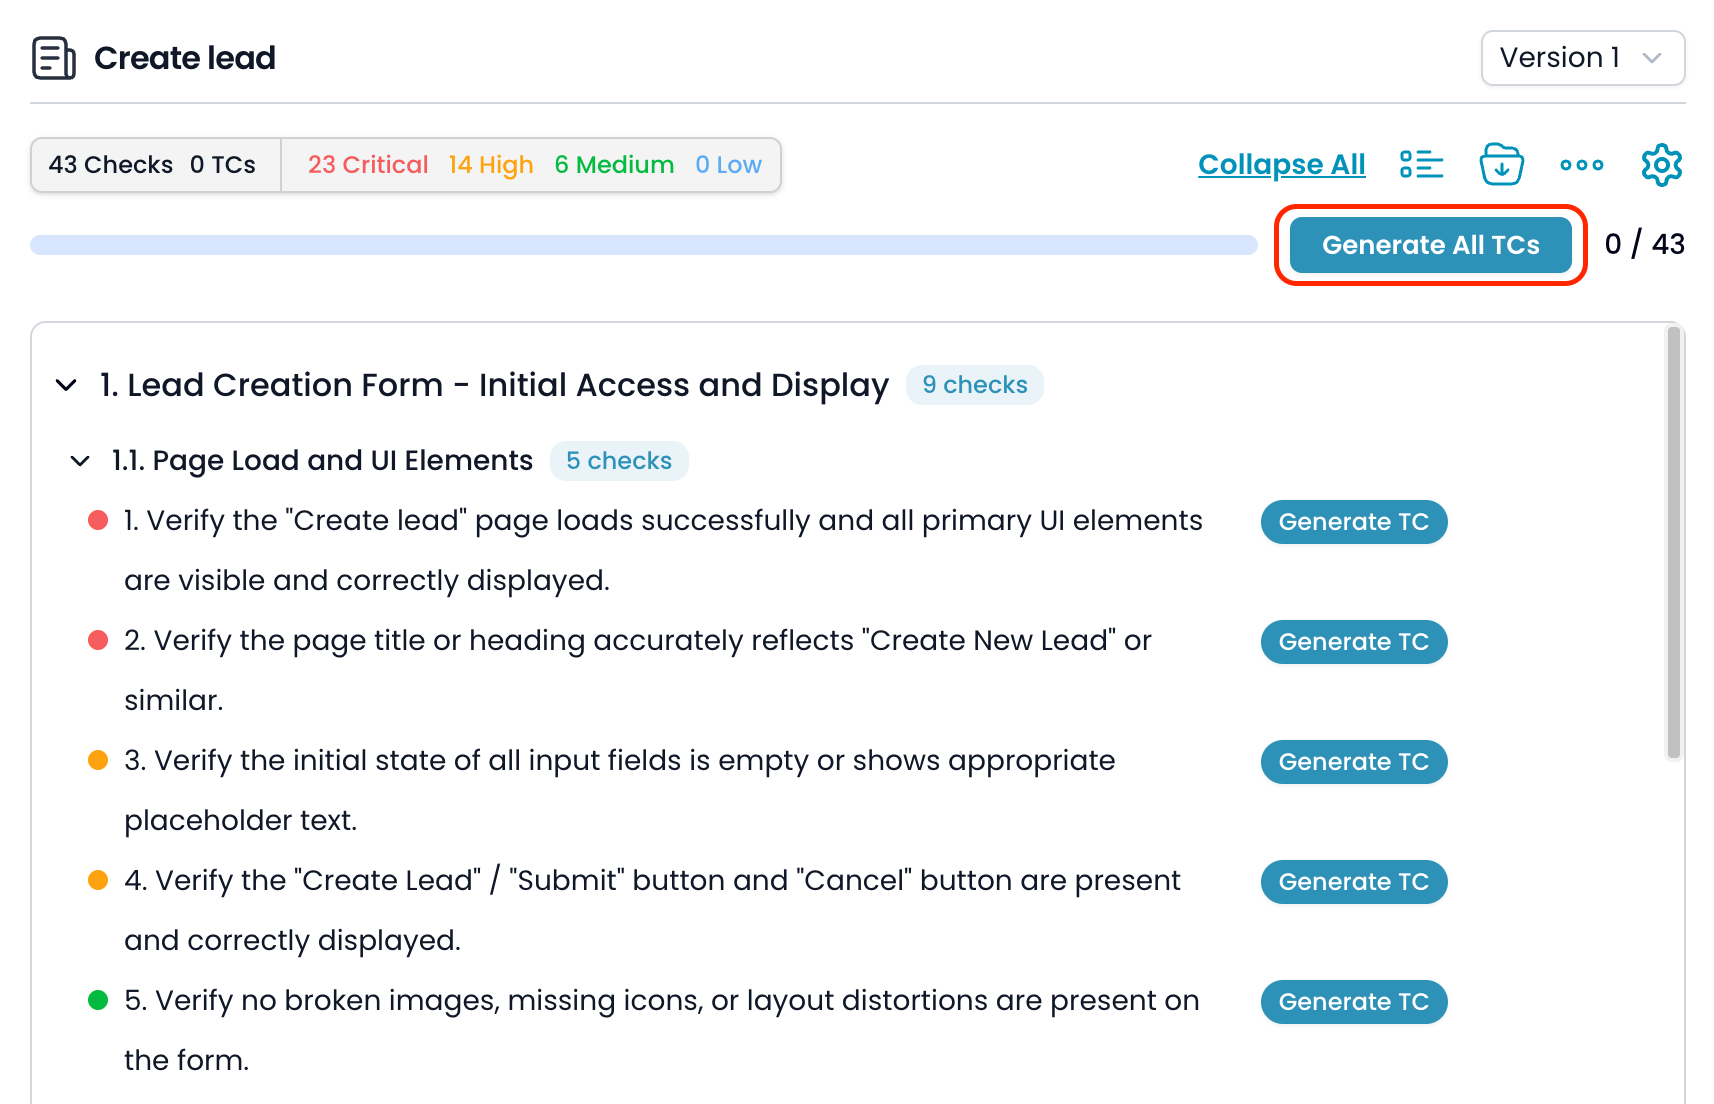
5. Review the Checklist
- AI will generate a checklist of all potential cases based on your requirements.
- The checklist is grouped by categories, sub-category and priorities (Critical, High, Medium, Low).
6. Refine the checklist (Optional)
- You can comment, add, remove, or adjust any checklist item.
- Once done, click Update with changes to re-sync the checklist with your adjustments.
Update With Changes
Edit, add comments then updating checklist following comments.
7. Generate Test Cases
You have flexible options for generating test cases:- Generate All TCs: Create test cases for every checklist item at once.
- Generate TCs by category or sub-category.
- Generate TC for a single checklist item.
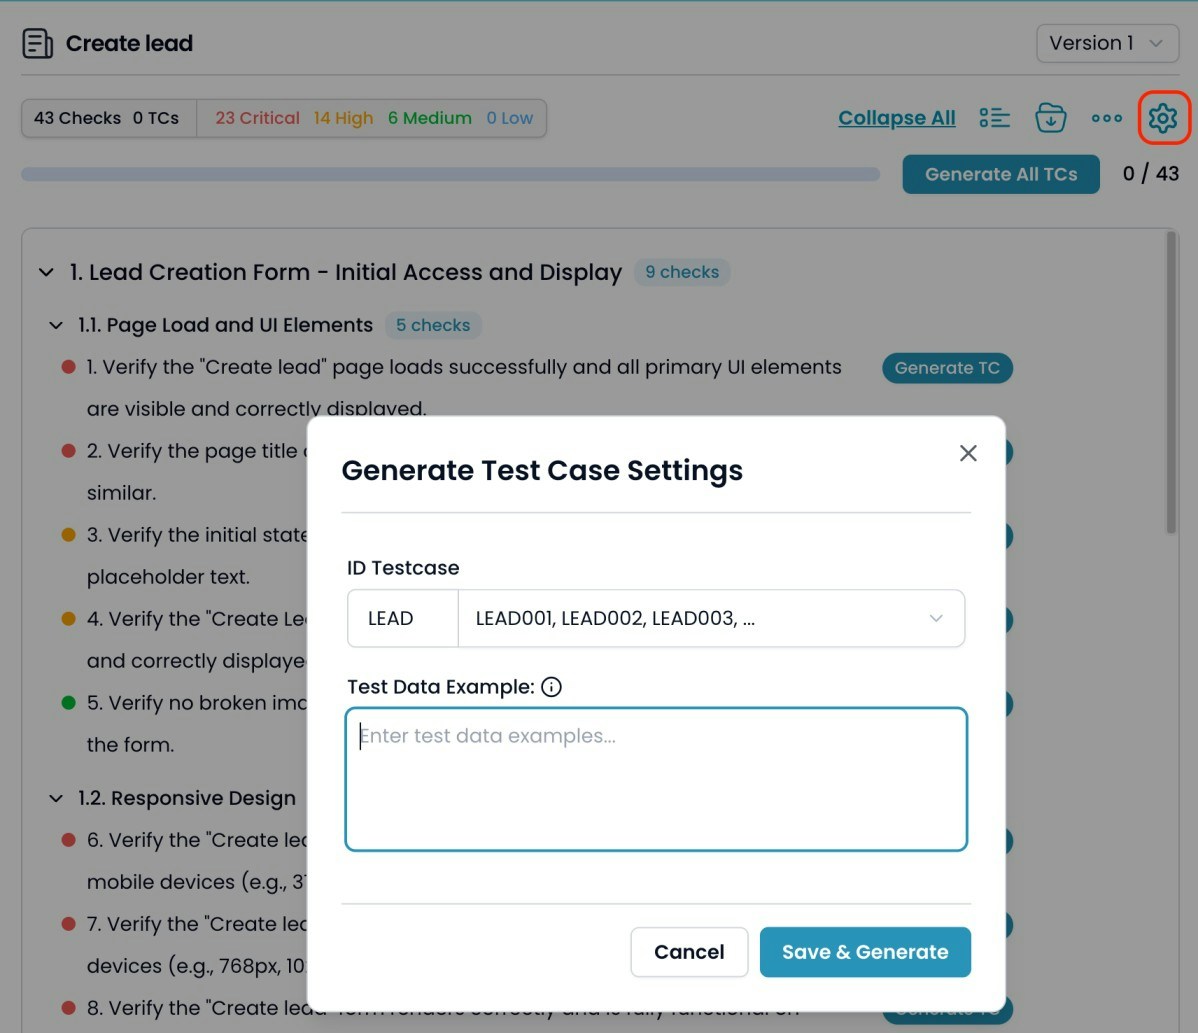
Test Case Settings Popup
On the first generate action or clicking on Setting icon, you’ll see a popup to configure:- Test Case ID Prefix: Set how your test cases are numbered (e.g. LEAD001).
- Test Data Example: Optionally provide test data. This will be sent to AI with each generation or update.
8. Update Test Case
You have flexible requesting to regenerat test case with comment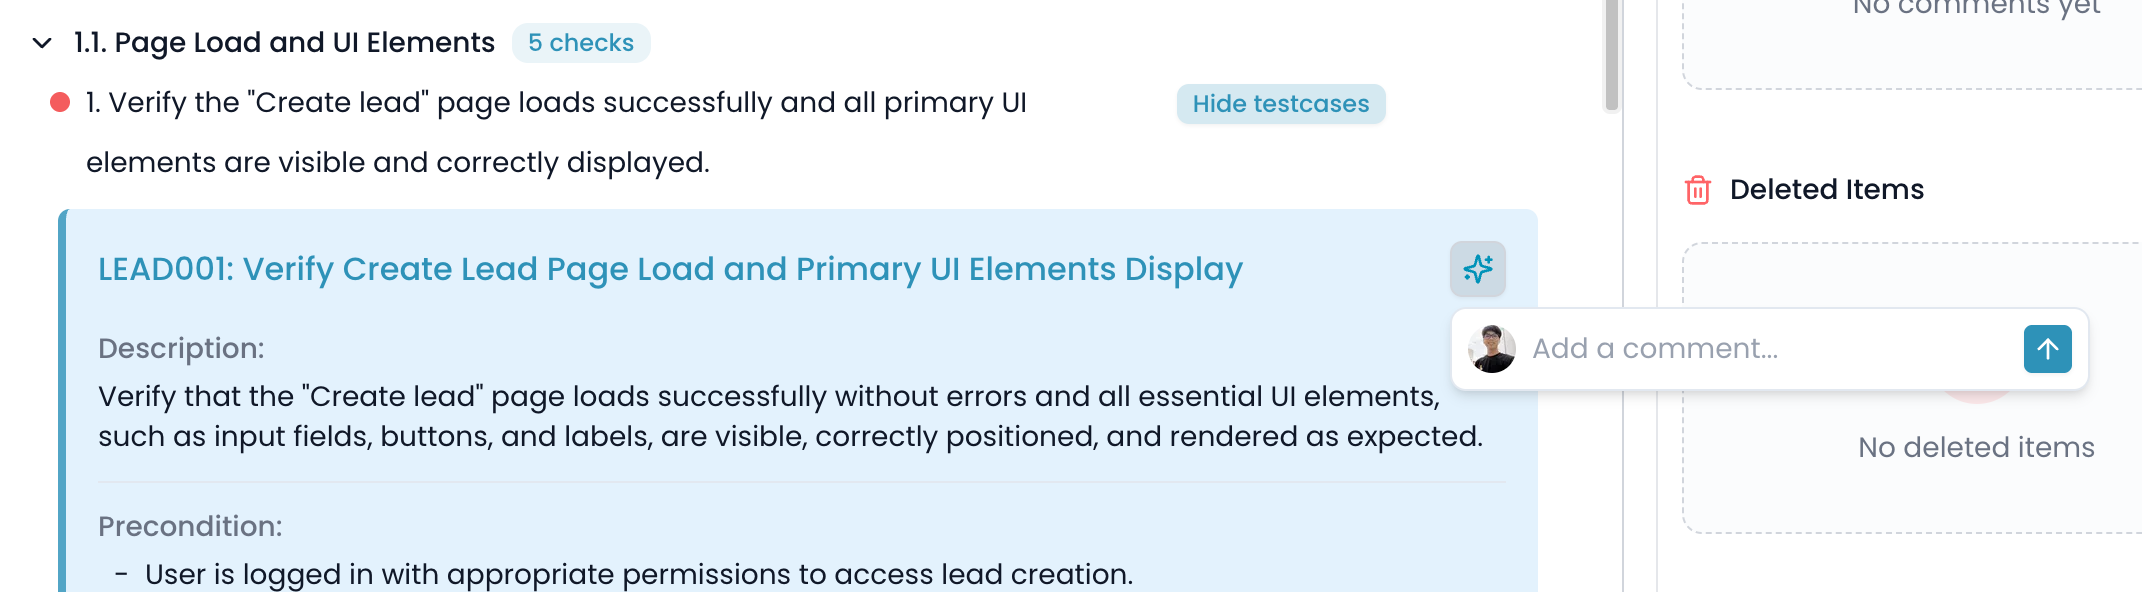
Update Testcase
Comment and request to regenerate a test case
9. View Test Case Generation History
- You can view all history of changes: checklist creation, test cases generation, additions, removals, translations, etc.
Timeline
View all history of changes
Versions
View versions of testcase
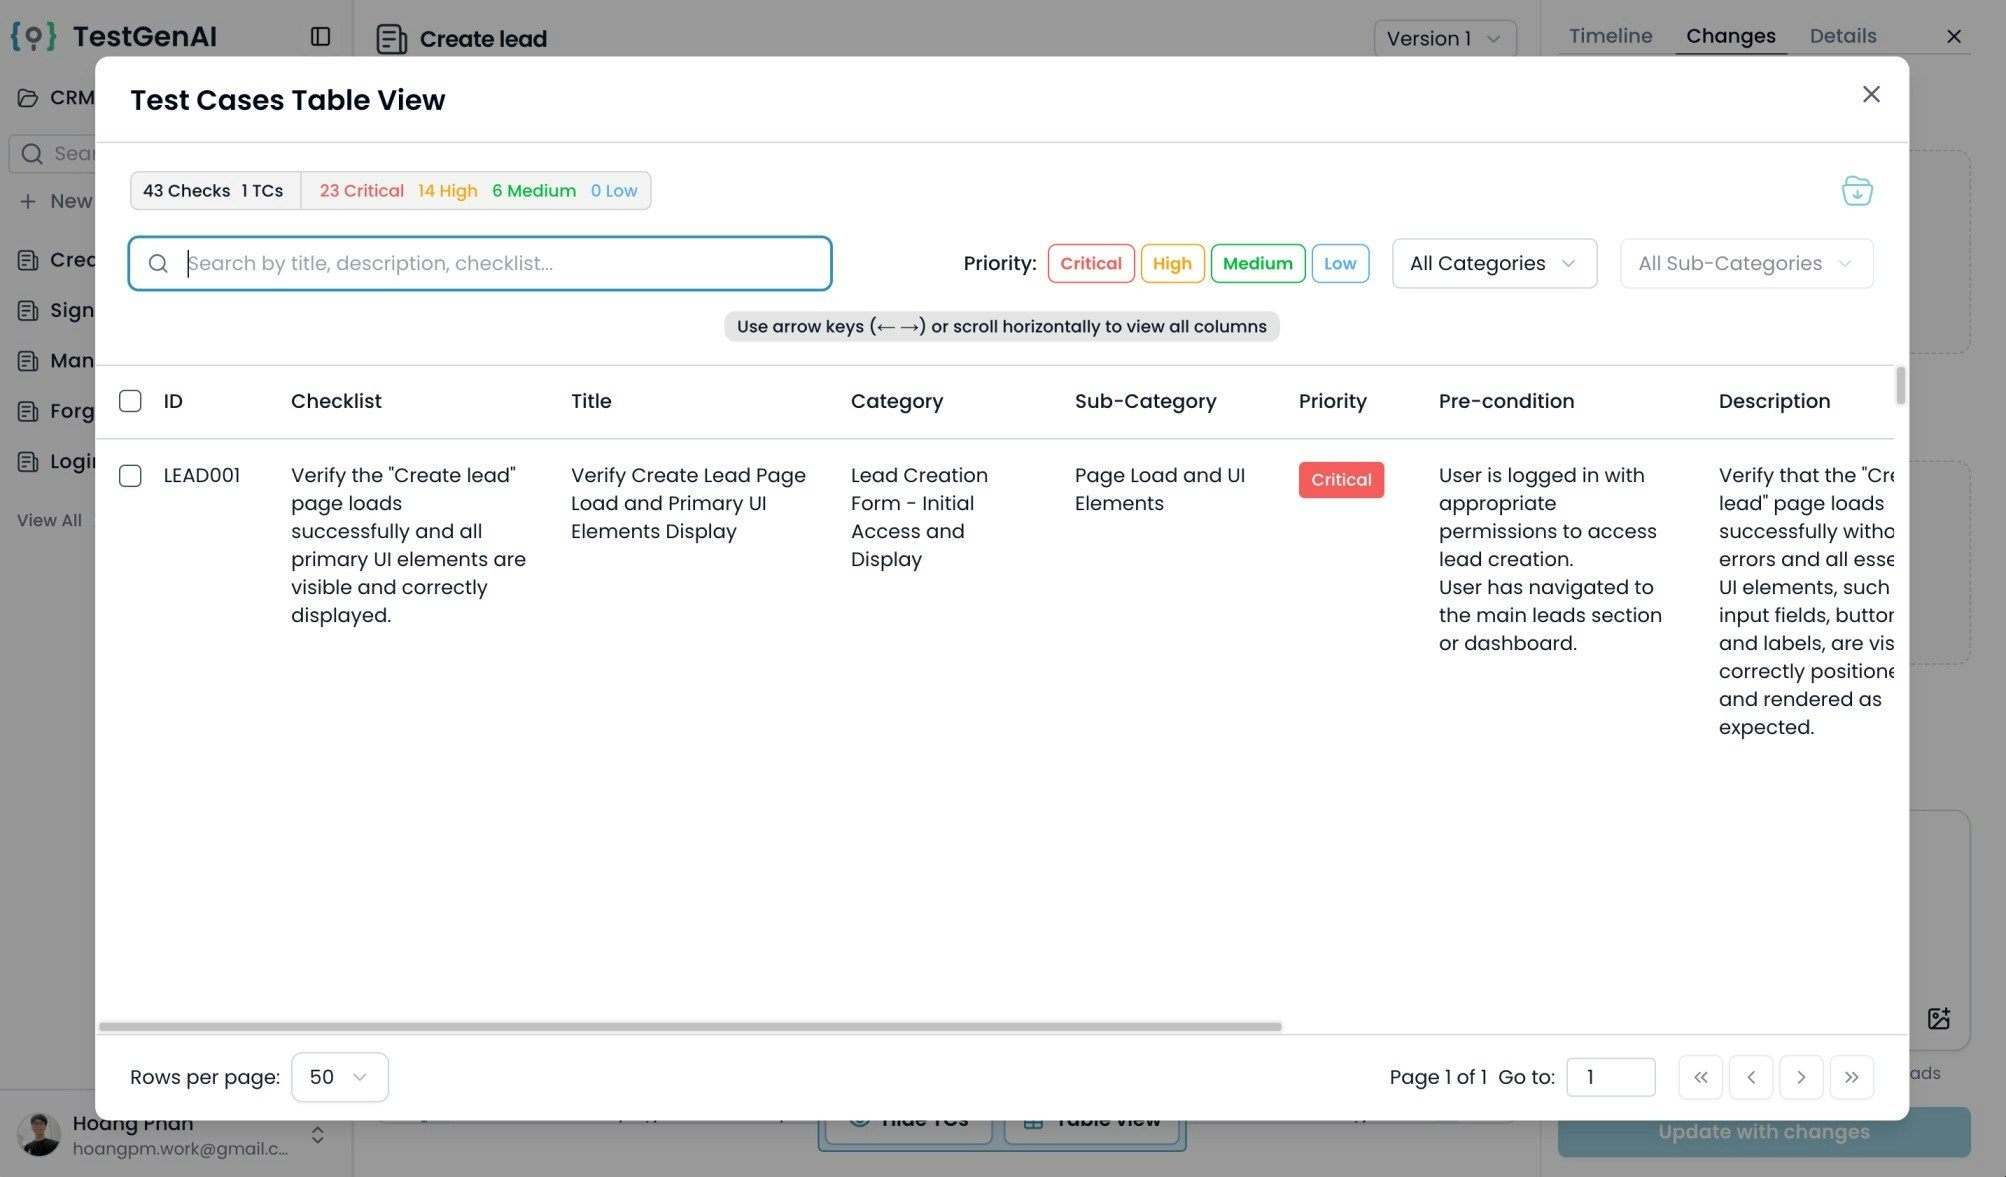
10. Table View & Filtering
- Switch to Table View to view test cases in a grid, making it easy to search, filter, and review details.
- Filter by priority, category, sub-category, or search by keyword.
11. Continue Generation
- If not all test cases have been generated for a feature, click Continue to let the AI finish generating any remaining test cases.

Notes
- You can always return to refine requirements, add new files, or update the checklist.
- AI-generated test cases are customizable—review and adjust as needed for your team’s standards.
- The process supports both high-level checklist generation and detailed test cases, step-by-step test cases.
11. Other related features
Translate Test Cases
Creates a new version with all test cases translated to selected language
Rebuild Checklist
Creates new checklist based on original requirements, ignoring current checklist
Clone checklist
Remove all test cases, keep the checklist, and create a new version
Export TCs
Export the selected test cases with selected fields and their orders