1. Create a New Project
You can create a new project in two ways:
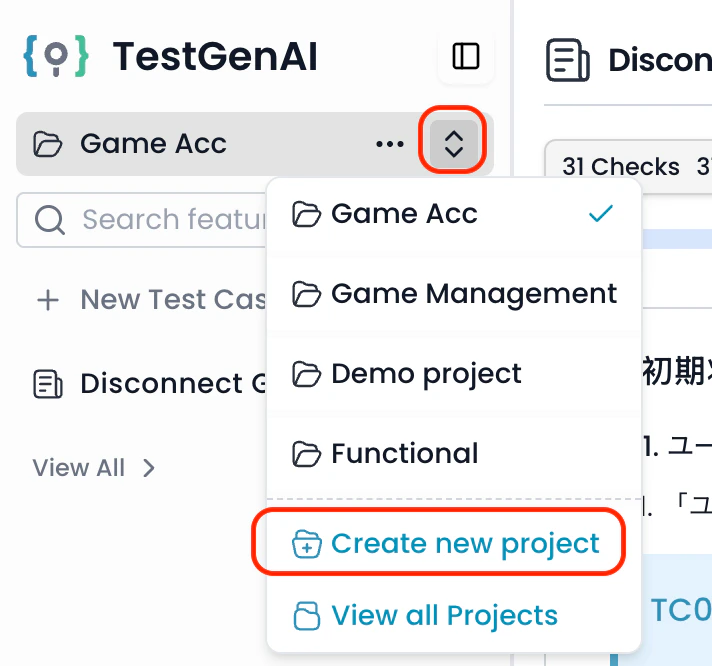
Option 1: From Project Dropdown
- Hover over the current project name at the top-left of the sidebar to reveal the dropdown arrow.
- Click the down arrow icon to open the project list.
- Select Create new project from the dropdown.
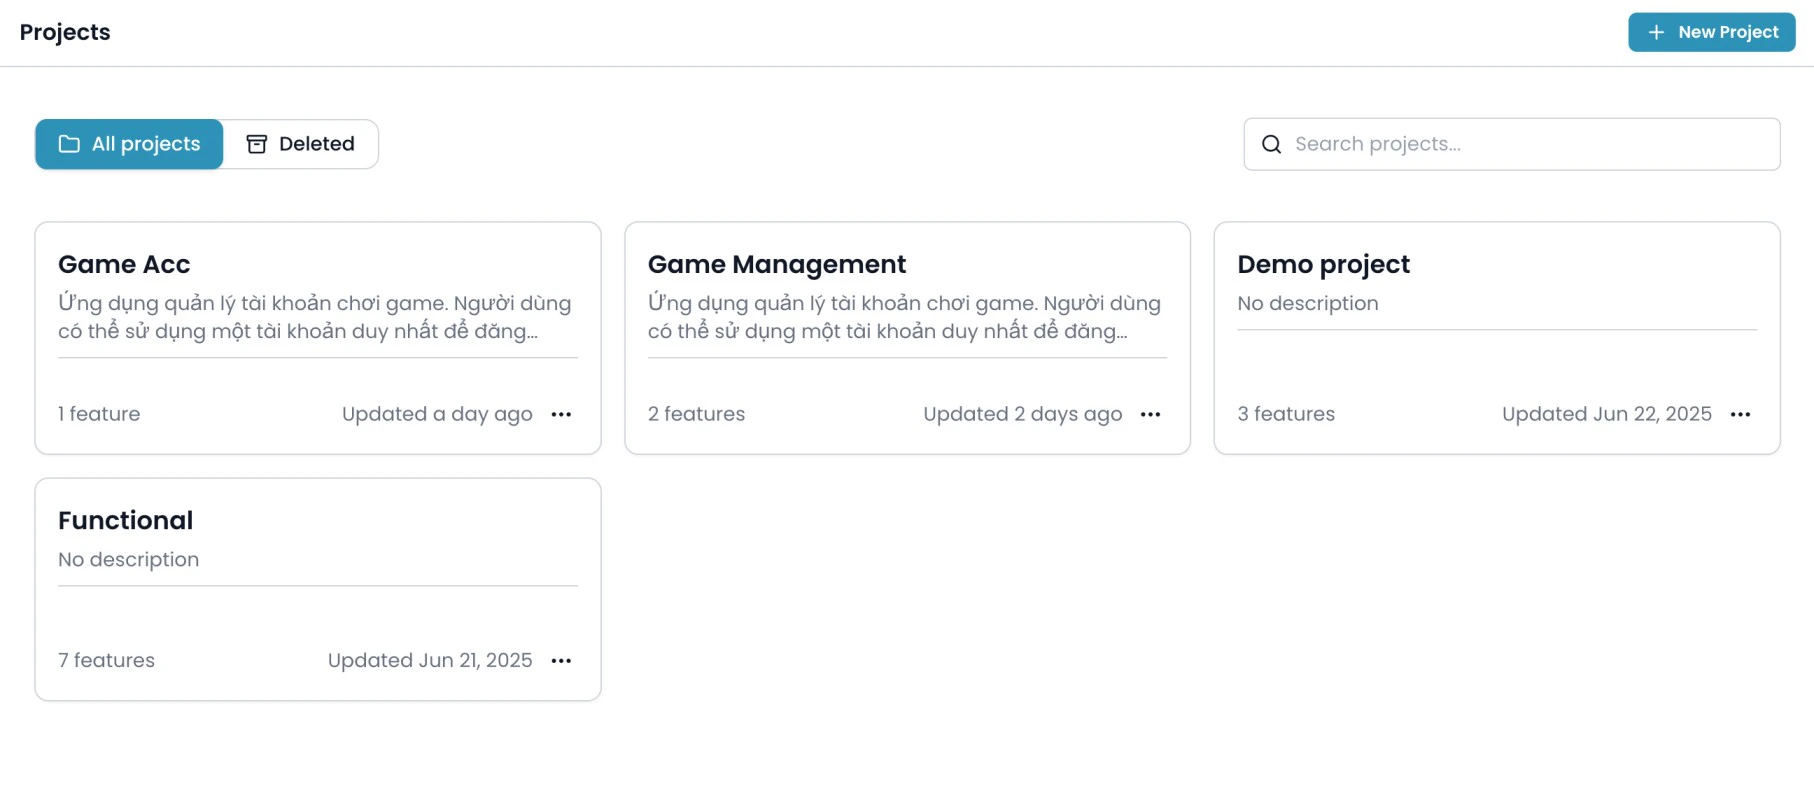
Option 2: From Project List
- Click View all Projects in the sidebar to open the projects overview.
- Click the New Project button to start creating a new project.
2. Project Setup Fields
Fill out the following fields in the Create a new project form:
- Name (required):
The project’s name.
- Description (optional):
Describe the project to help AI understand the context (e.g., “A CRM system for sales teams…”).
- Test cases Languages:
Select one or more languages for test case generation. The first language selected will be the default.
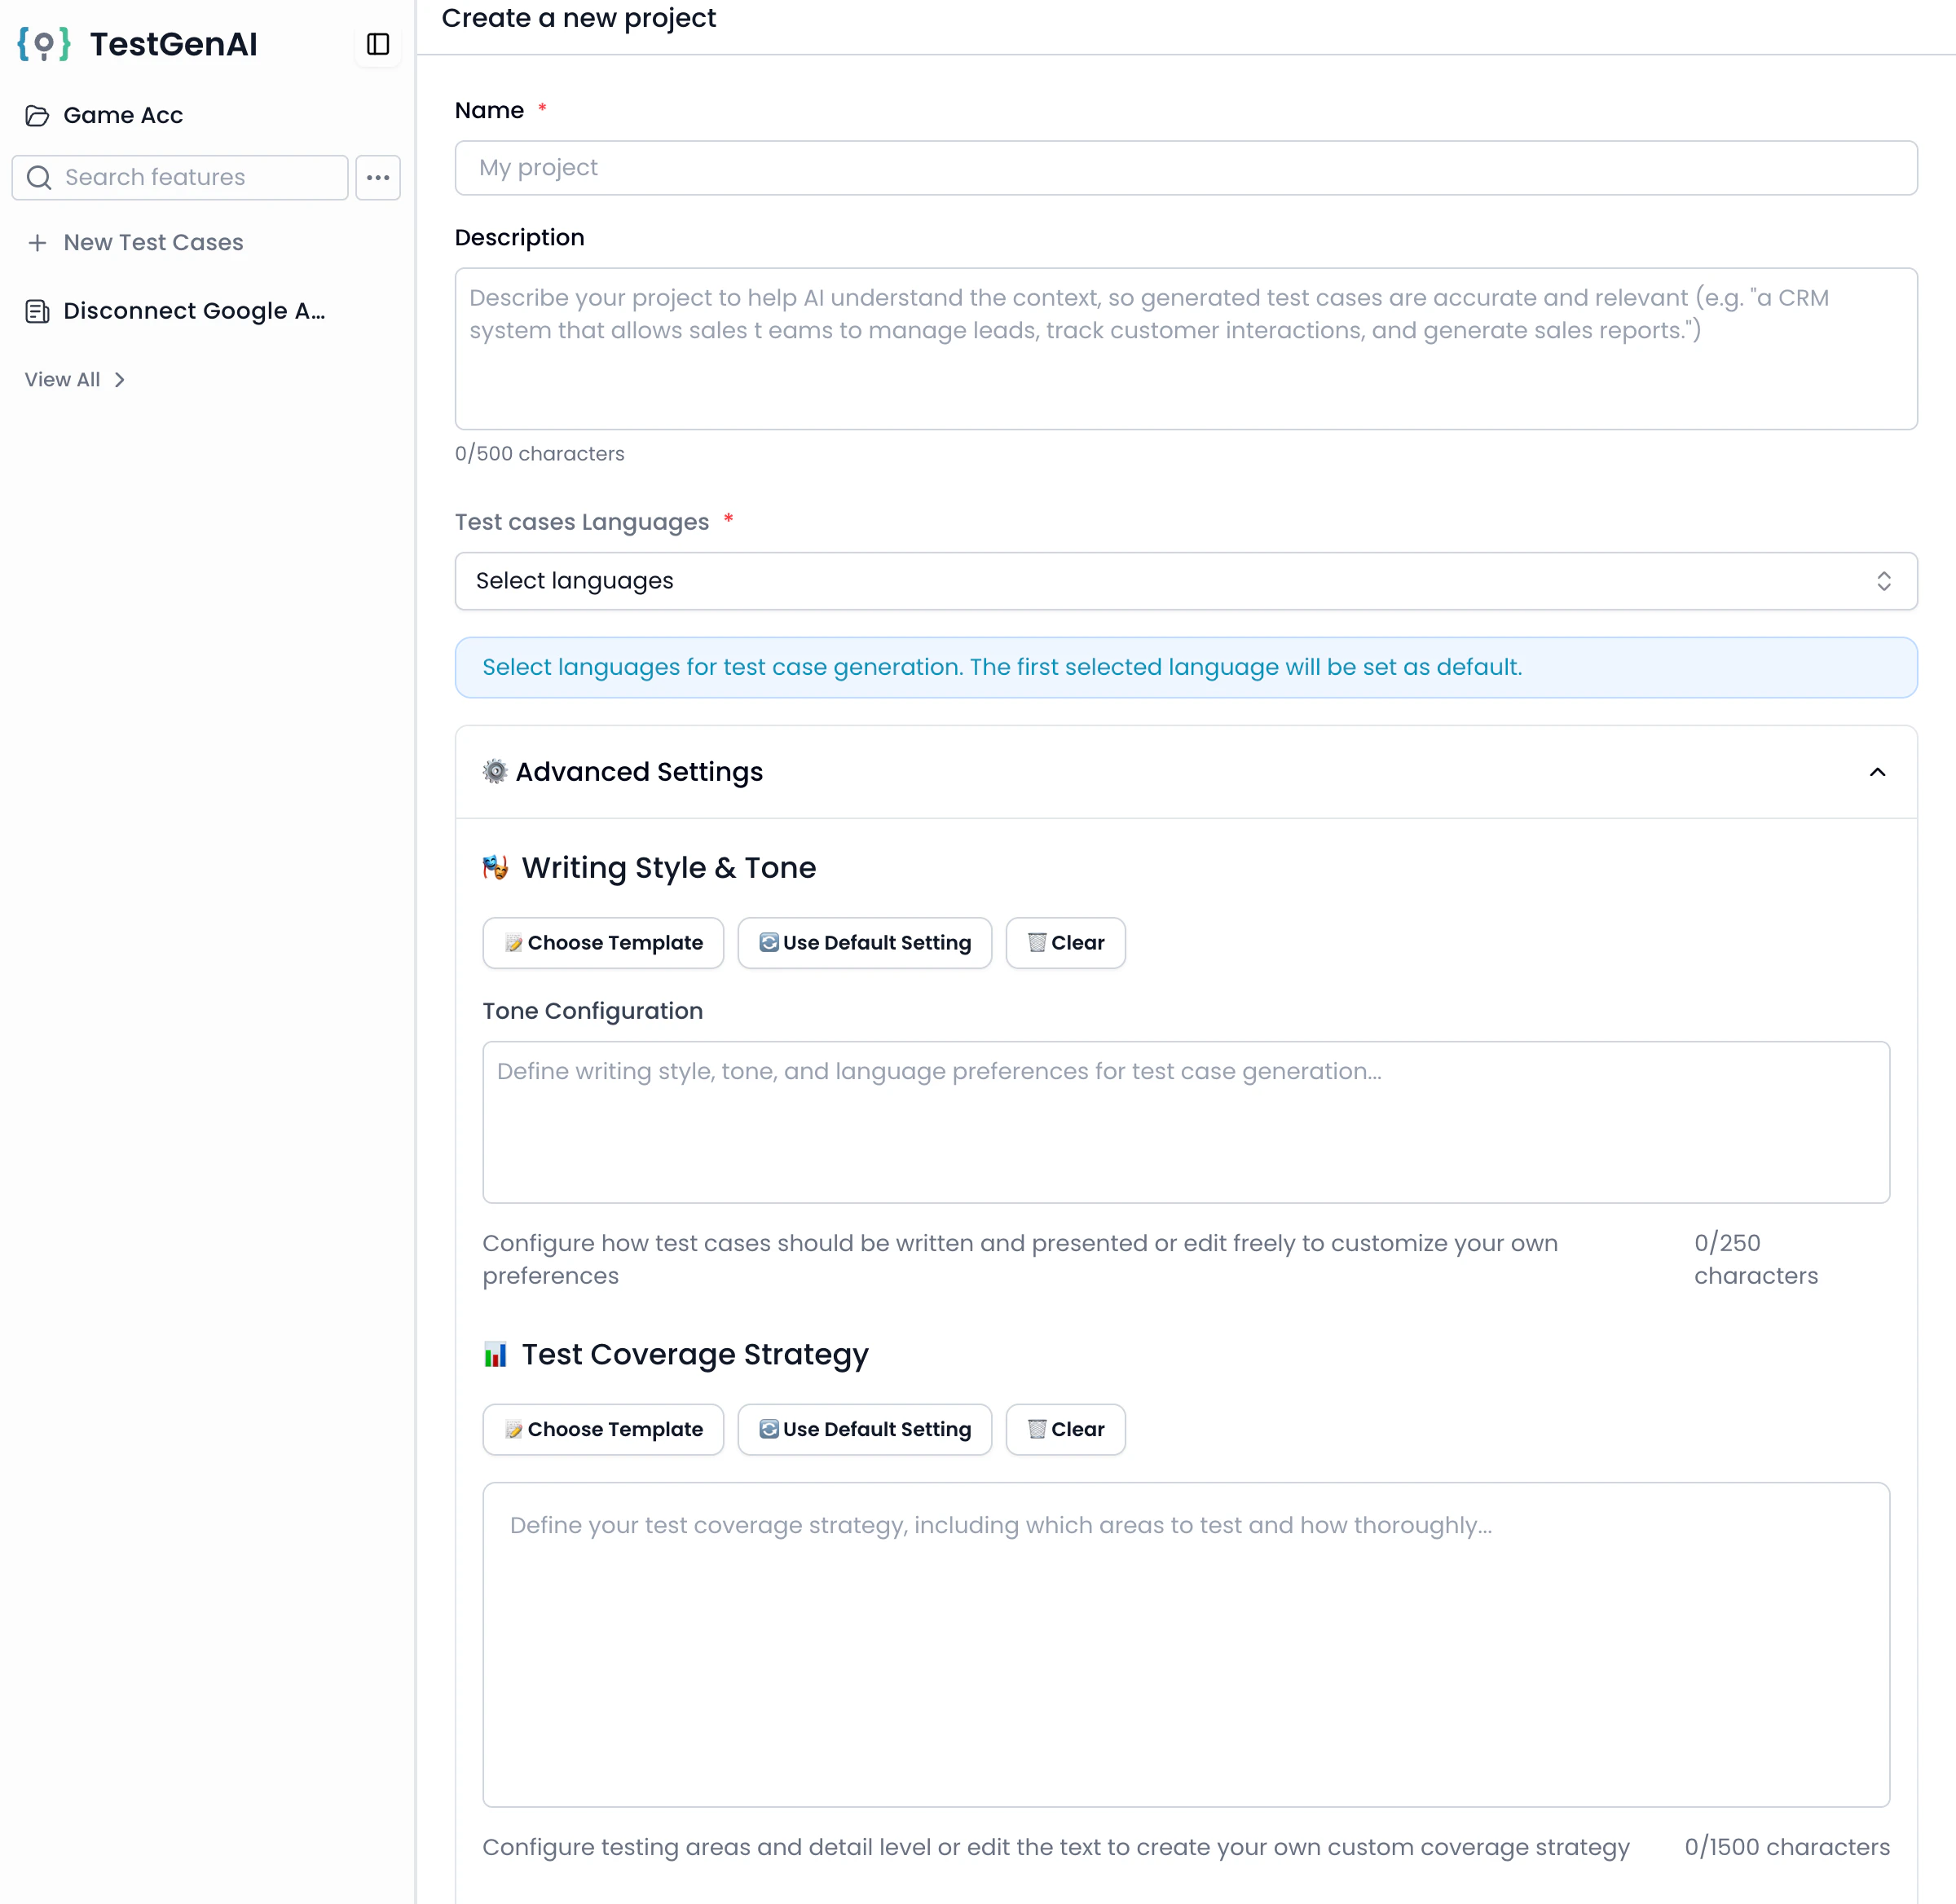
2.2. Advanced Settings
Expand Advanced Settings to configure how AI generates your test cases. If you do not configure these settings, the default configuration will be used.
a. Writing Style & Tone
- Define the writing style, tone, and language for your test cases.
- Use templates, default, or specify your own preferences.
b. Test Coverage Strategy
- Specify which types of testing to cover (e.g., UI Testing, Functional Testing, Data Validation).
- Use templates or write a custom strategy.
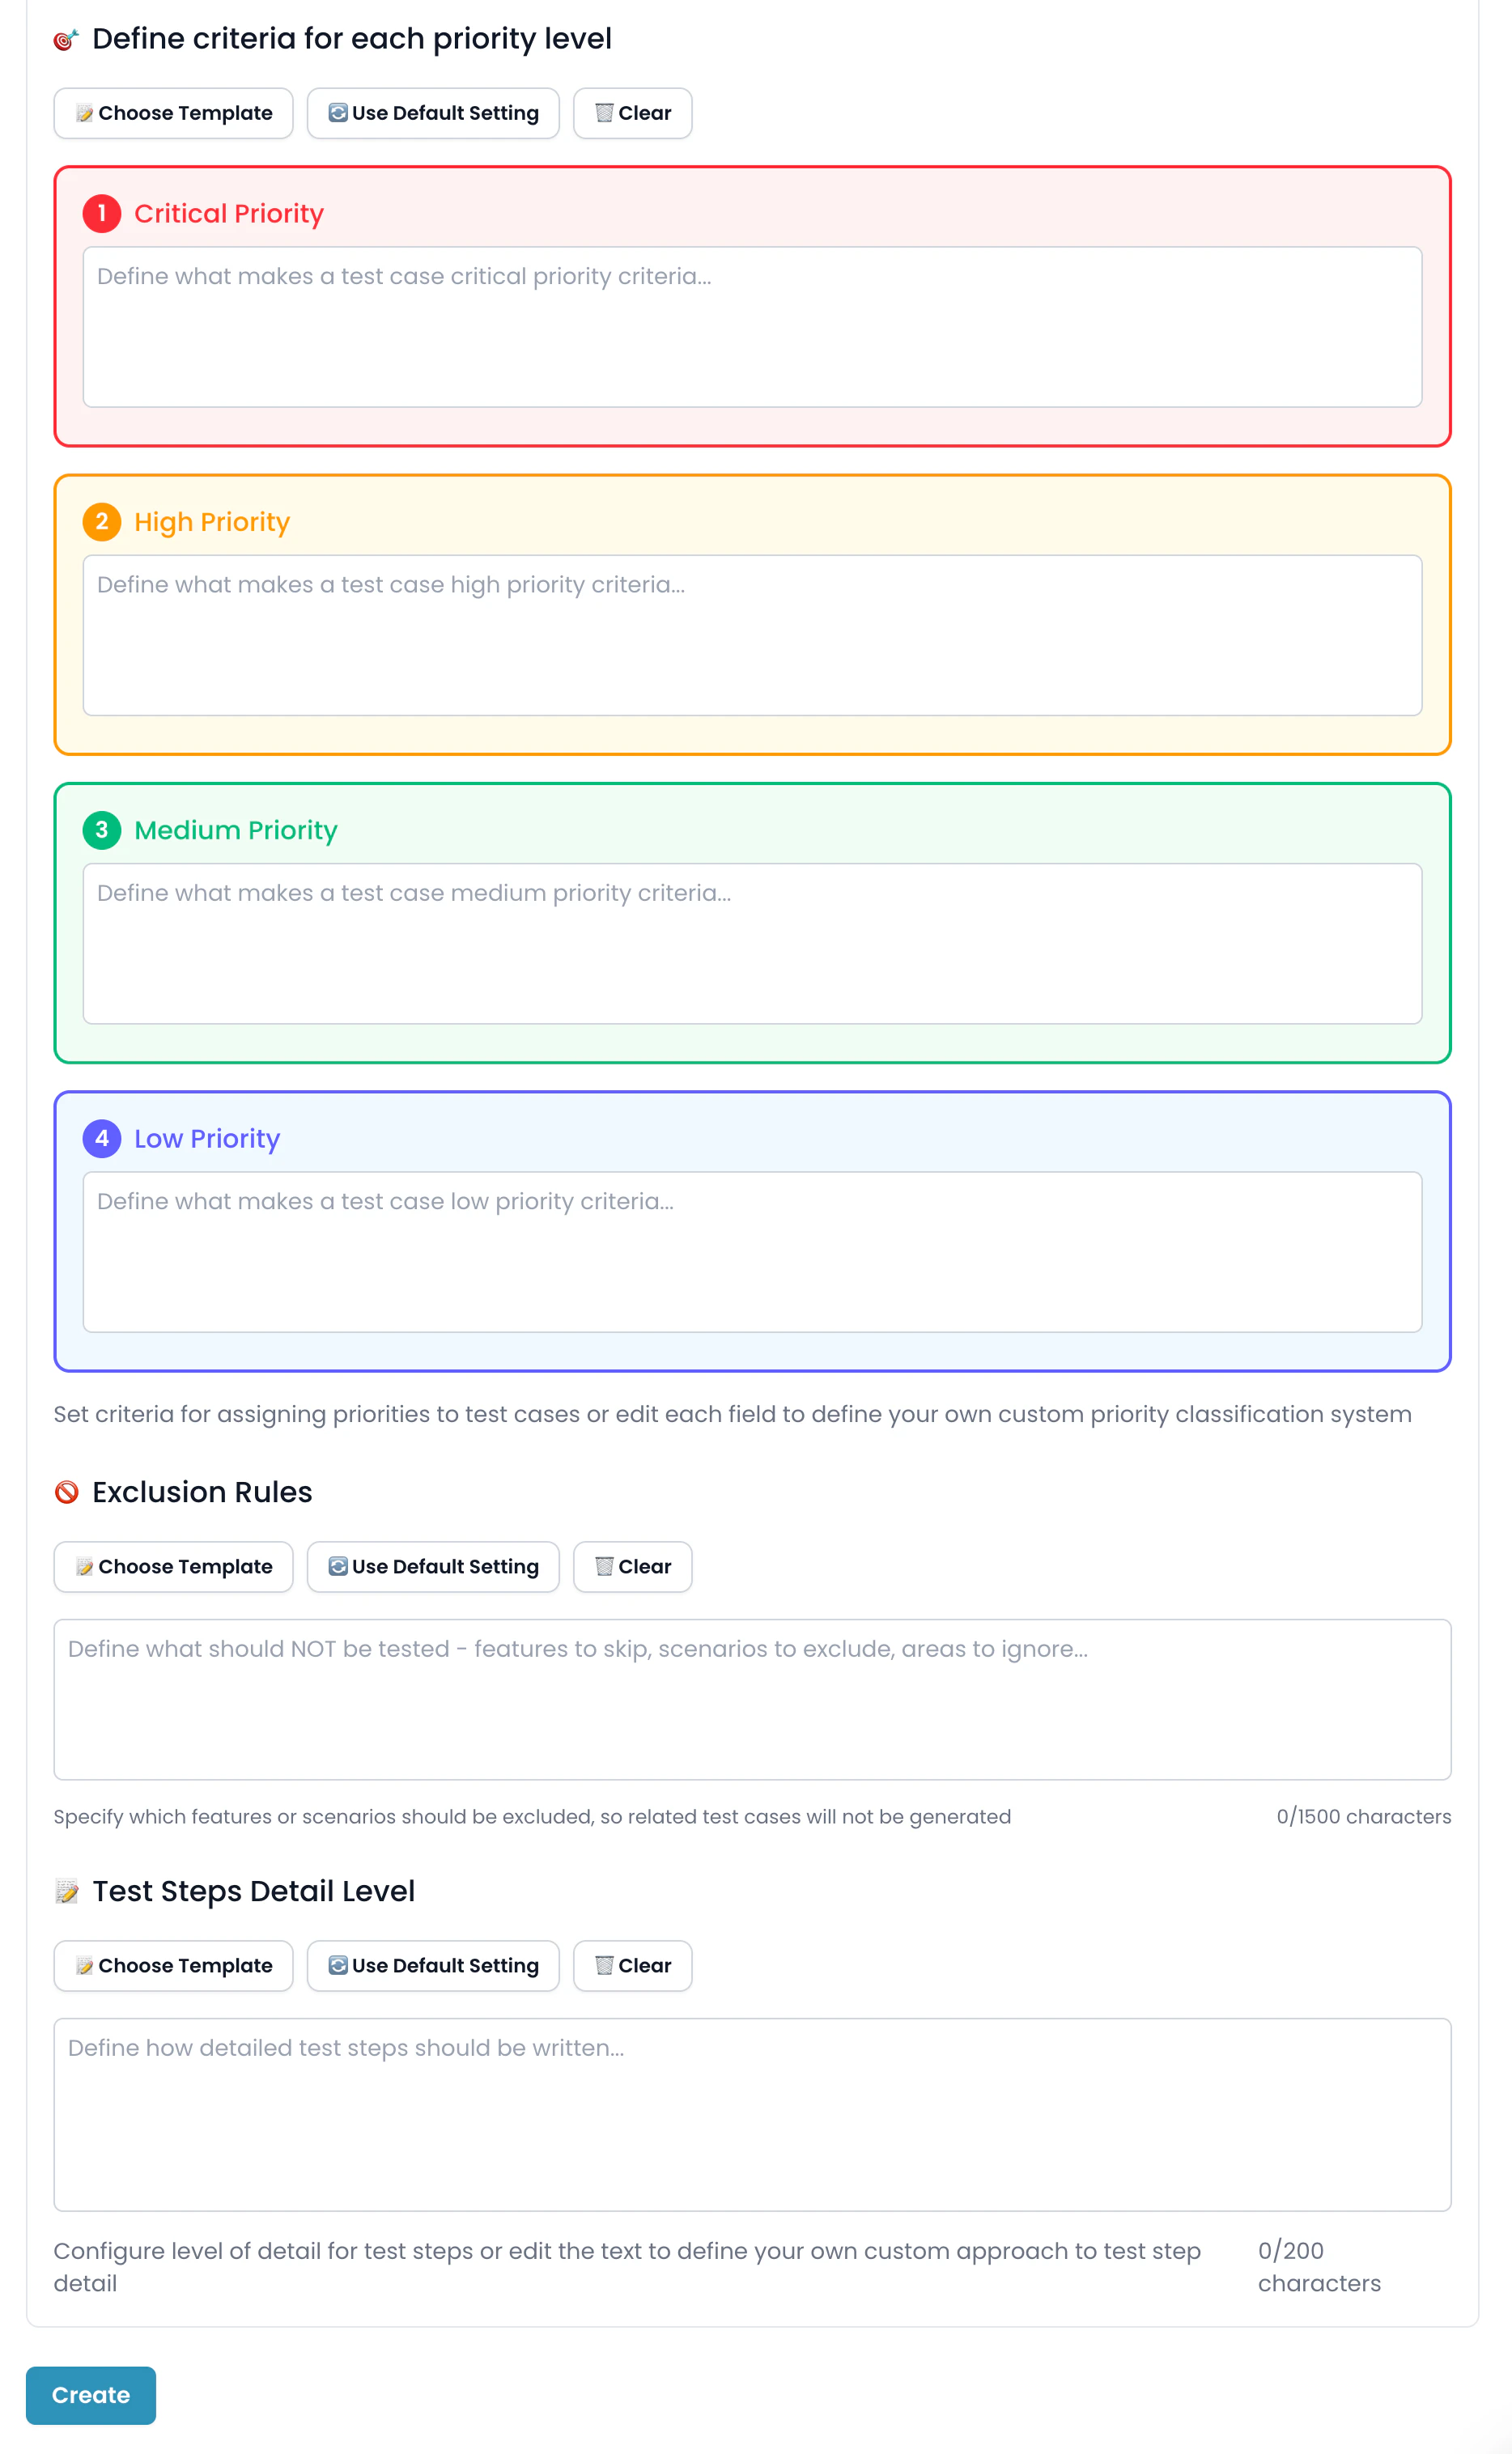
c. Priority Levels
Set criteria for four priority levels:
- Critical Priority: What makes a test case critical?
- High Priority
- Medium Priority
- Low Priority
For each level, describe when a test case should be assigned that priority.
d. Exclusion Rules
- Define what should not be tested (features to skip, cases to exclude, etc.).
- AI will avoid generating test cases for these.
e. Test Steps Detail Level
- Specify how detailed the test steps should be (high-level steps or fine-grained instructions).
Once all required and any desired optional fields are complete, click Create to add your new project.
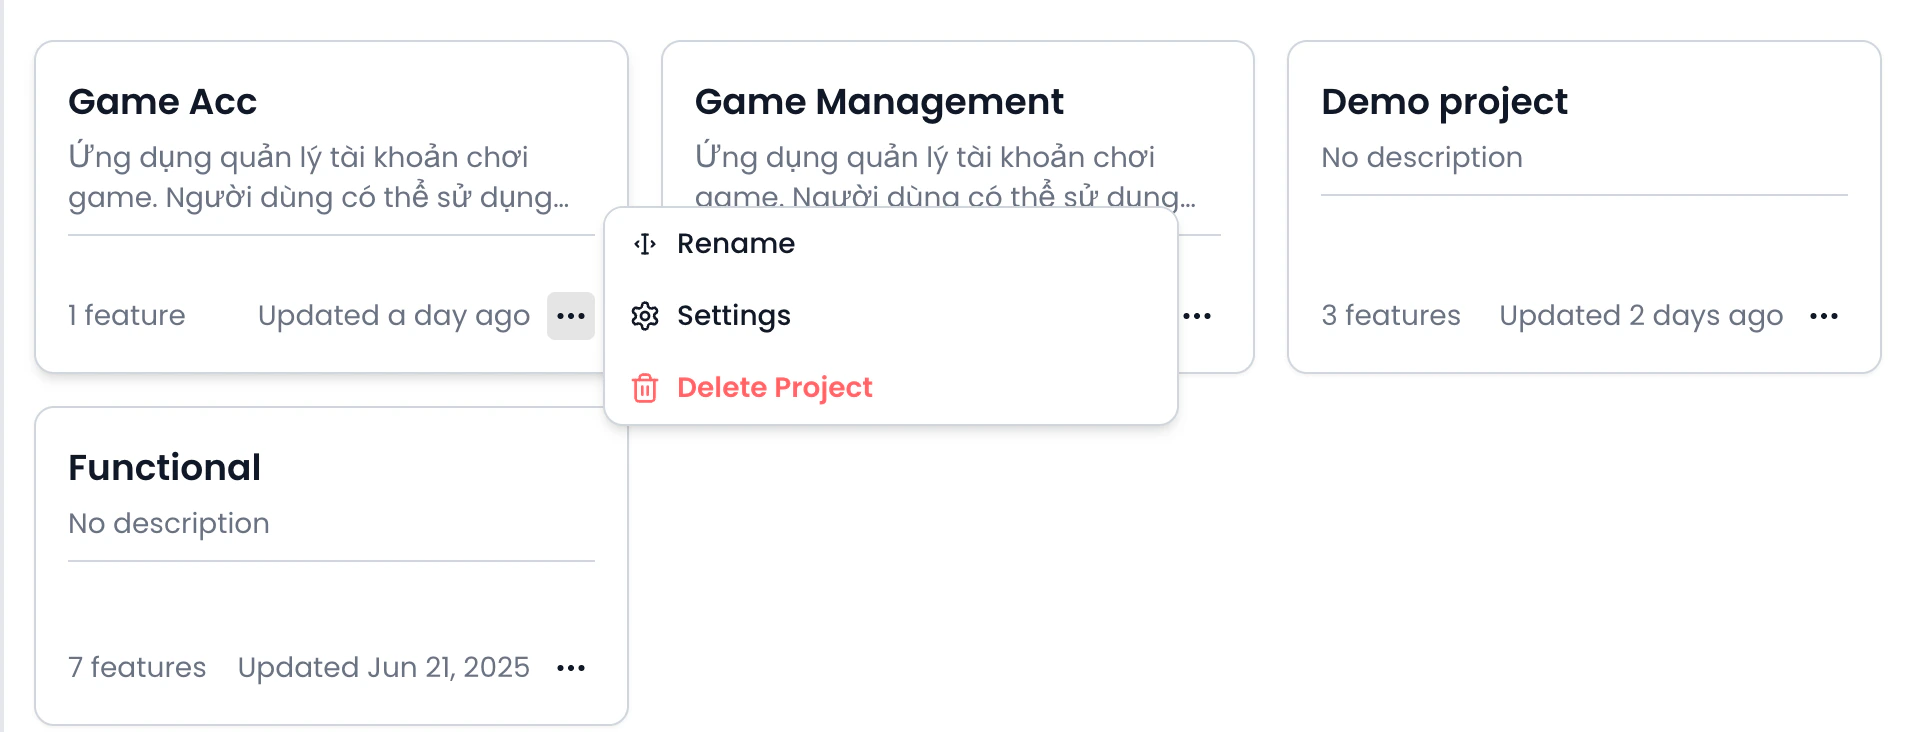
3. Viewing and Managing Projects
- Click View all Projects in the sidebar to see all your projects.
- For each project card, click the three-dot menu (…) to:
- Rename the project
- Access Settings to edit configurations at any time
- Delete Project if no longer needed
 You can always revisit and edit your project’s settings to adapt as your requirements evolve.
Tip:
Customize advanced settings for the best AI-generated test cases. You can update project settings anytime.
Impact NoticeThe updated settings will only apply to new features created after this changeWhen regenerating existing features, new settings will apply, but previous test cases will remain unchanged