1. How “Update with changes” Works
- You review the generated Checklist.
- You can comment to request additions, removals, splits, merges, or other edits.
- All your changes and comments appear in the right sidebar under the Changes tab.
- When ready, click Update with changes:
AI will process your feedback and update the Checklist accordingly. The new version of test cases will be created.
2. Types of Change Requests & How to Use Them
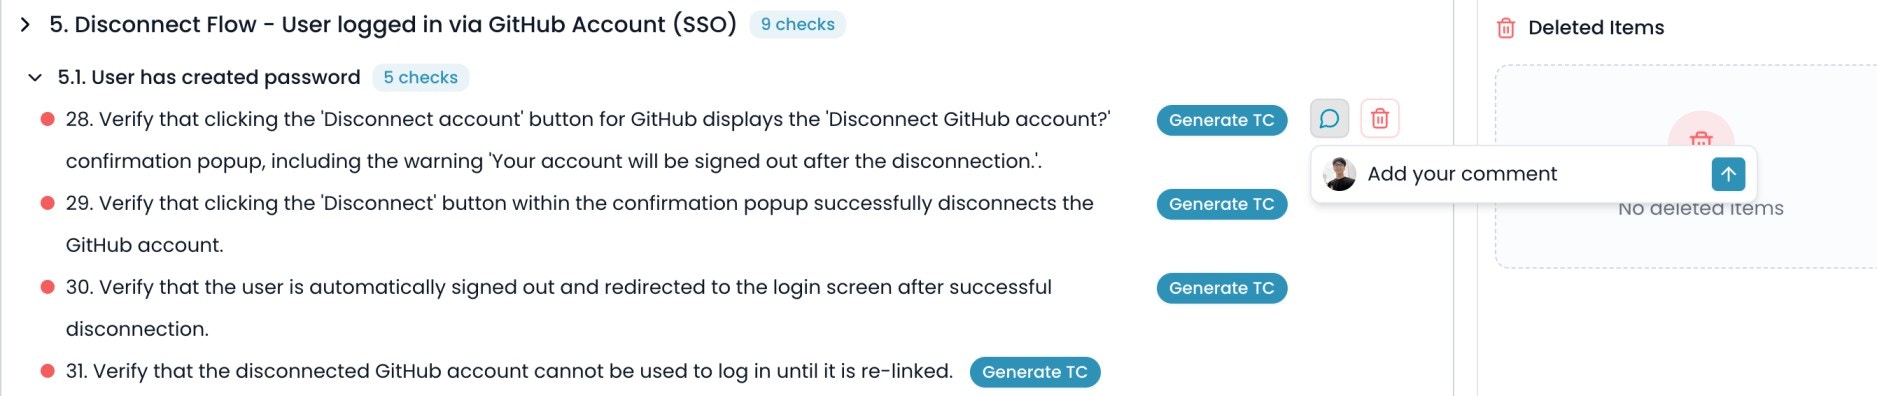
2.1. Comment on a checklist item
Use: Request changes, split into sub-checklist, or clarify details. How to:- Hover over a checklist row.
- Click the comment icon (speech bubble).
- Enter your comment and click the up arrow to submit.
- The checklist with comment will be added to Comments in the Changes sidebar.
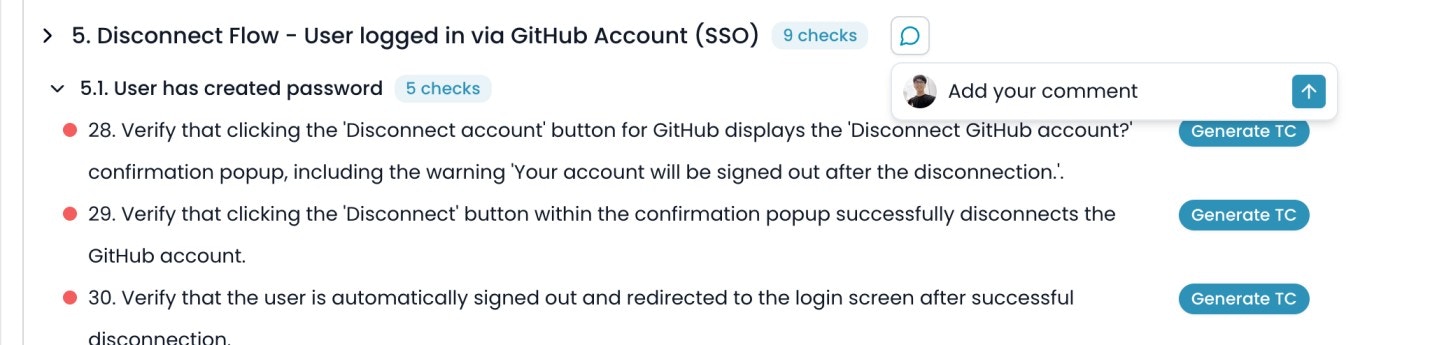
2.2. Comment on a Category or Sub-category
Use: Request to add checklist to category/sub-category, change category/sub-category structure, or add clarifying notes. How to:- Hover over a category/sub-category title.
- Click the comment icon.
- Enter your comment and click the up arrow to submit.
- The checklist with comment will be added to Comments in the Changes sidebar.
2.3. Delete a checklist item
Use: Request removal of a checklist. How to:- Hover over the checklist.
- Click the trash icon.
- The checklist will be added to Deleted Items in the Changes sidebar.
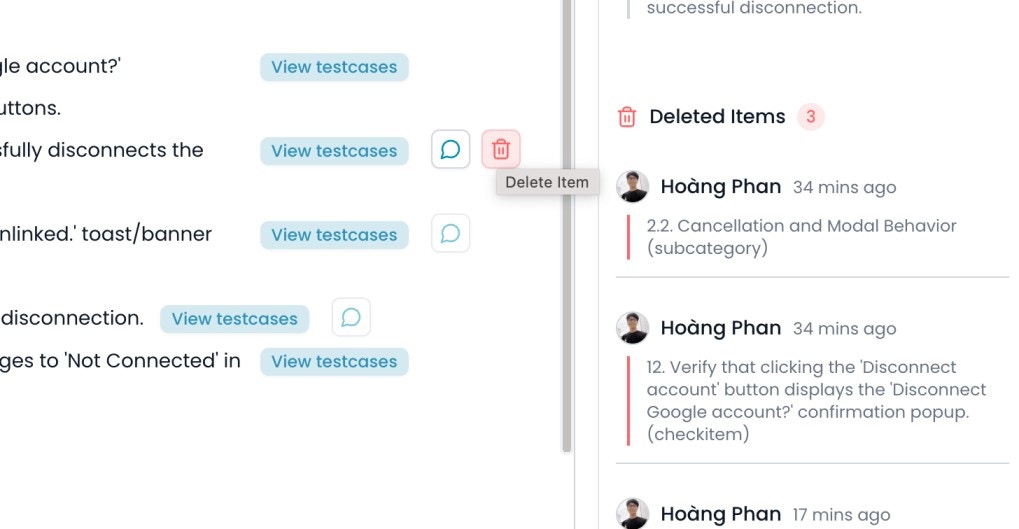
2.4. Delete a Category or Sub-category
Use: Remove a whole group and all its checklist. How to:- Hover over the category/sub-category.
- Click the trash icon.
- The category/sub-category are added to Deleted Items.
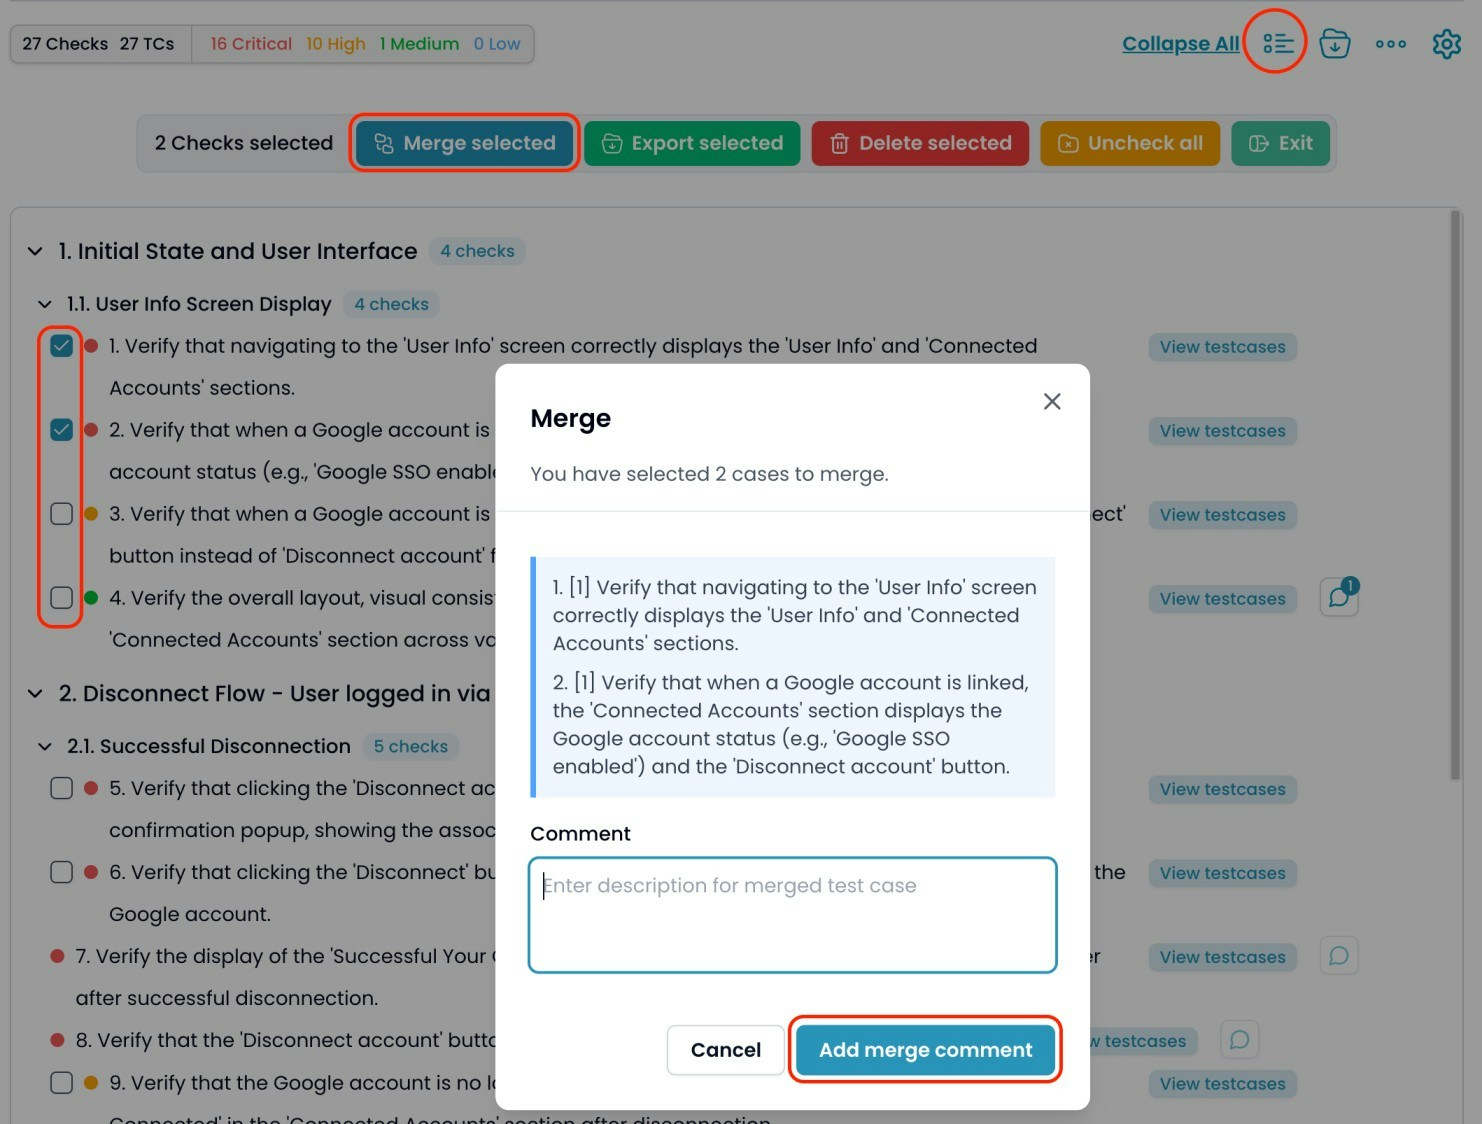
2.5. Merge Checklist
Use: Combine duplicate or overly detailed checklist into fewer, more concise ones. How to:- Click the Multi-select icon (next to download icon).
- Check the boxes beside the checklist you want to merge.
- Click Merge selected.
- In the popup, write your merge comment/description (or leave empty for a default merge).
- Click Add merge comment.
2.6. General Comments & Attachments
Use: General requests, adding more business rules, asking to add checklist, or clarifying with files or images. How to:- Enter your request in the input box in the Changes sidebar.
- Optionally, use the attachment icon to add files/images.
- Click Update with changes when finished.

3. Tracking and Applying Changes
- All comments, deletes, and merge actions appear in the Changes sidebar.
- When ready, click Update with changes at the bottom of the sidebar.

- AI will process your requests and update the checklist.
- Previously generated Test Cases for unchanged checklist will remain.
For new/changed checklist, use Continue or Generate TC on each checklist to create new Test Cases.
Generate Test Cases
Create test cases from requirements and UI images
4. Reviewing Change History
- All change requests and updates are tracked in the Timeline tab for auditing and traceability.
- You can review what was requested and compare how AI updated the checklist.

Tips:
- Use comments for precise requests (e.g., “split this into 3 checklist for each user role”).
- Use merge when checklist are too detailed or duplicate.
- Attach screenshots or specs for complex changes.
- Always review the Timeline to ensure your requirements were correctly applied.