> ## Documentation Index
> Fetch the complete documentation index at: https://docs.testgenai.com/llms.txt
> Use this file to discover all available pages before exploring further.
> TestGenAI lets you manage multiple projects, each with its own test case configuration. This guide will show you how to create a new project, customize its settings, and manage your existing projects.
# Project
## 1. Create a New Project
You can create a new project in two ways:
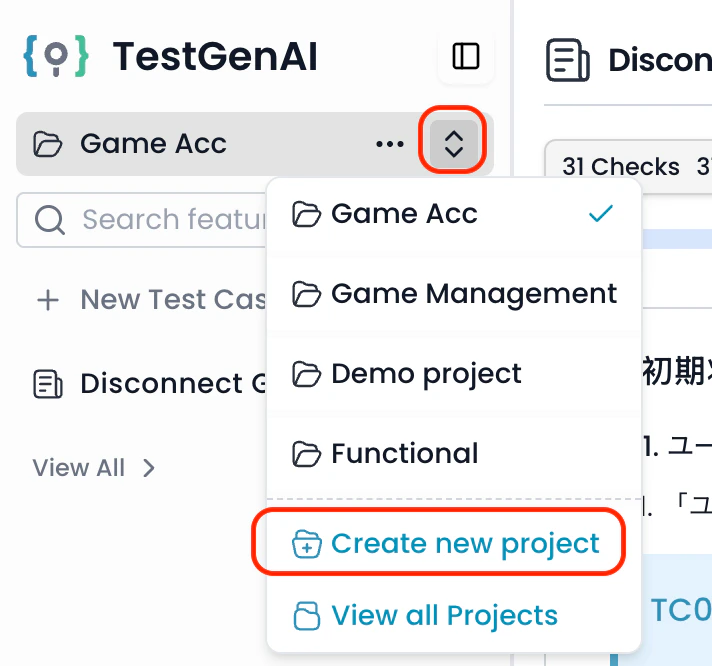
### Option 1: From Project Dropdown
1. **Hover over the current project name** at the top-left of the sidebar to reveal the dropdown arrow.
2. Click the **down arrow icon** to open the project list.
3. Select **Create new project** from the dropdown.
 ### Option 2: From Project List
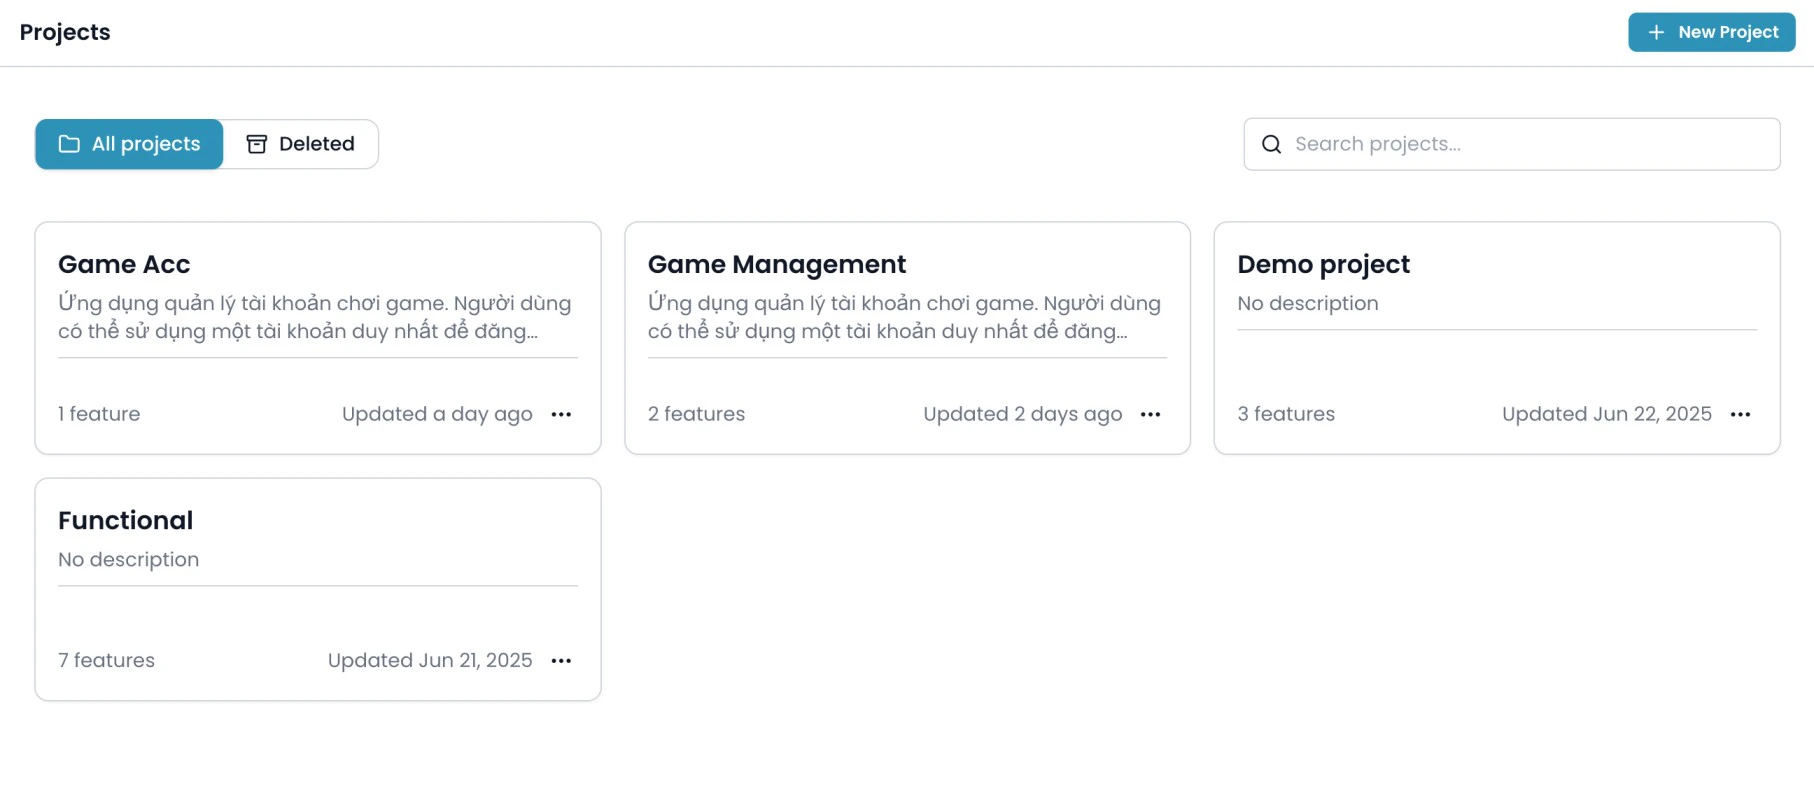
1. Click **View all Projects** in the sidebar to open the projects overview.
2. Click the **New Project** button to start creating a new project.
### Option 2: From Project List
1. Click **View all Projects** in the sidebar to open the projects overview.
2. Click the **New Project** button to start creating a new project.
 ***
## 2. Project Setup Fields
### 2.1. Basic Information
Fill out the following fields in the **Create a new project** form:
* **Name** (required):\
The project’s name.
* **Description** (optional):\
Describe the project to help AI understand the context (e.g., “A CRM system for sales teams...”).
* **Test cases Languages:**\
Select one or more languages for test case generation. The first language selected will be the default.
***
## 2. Project Setup Fields
### 2.1. Basic Information
Fill out the following fields in the **Create a new project** form:
* **Name** (required):\
The project’s name.
* **Description** (optional):\
Describe the project to help AI understand the context (e.g., “A CRM system for sales teams...”).
* **Test cases Languages:**\
Select one or more languages for test case generation. The first language selected will be the default.
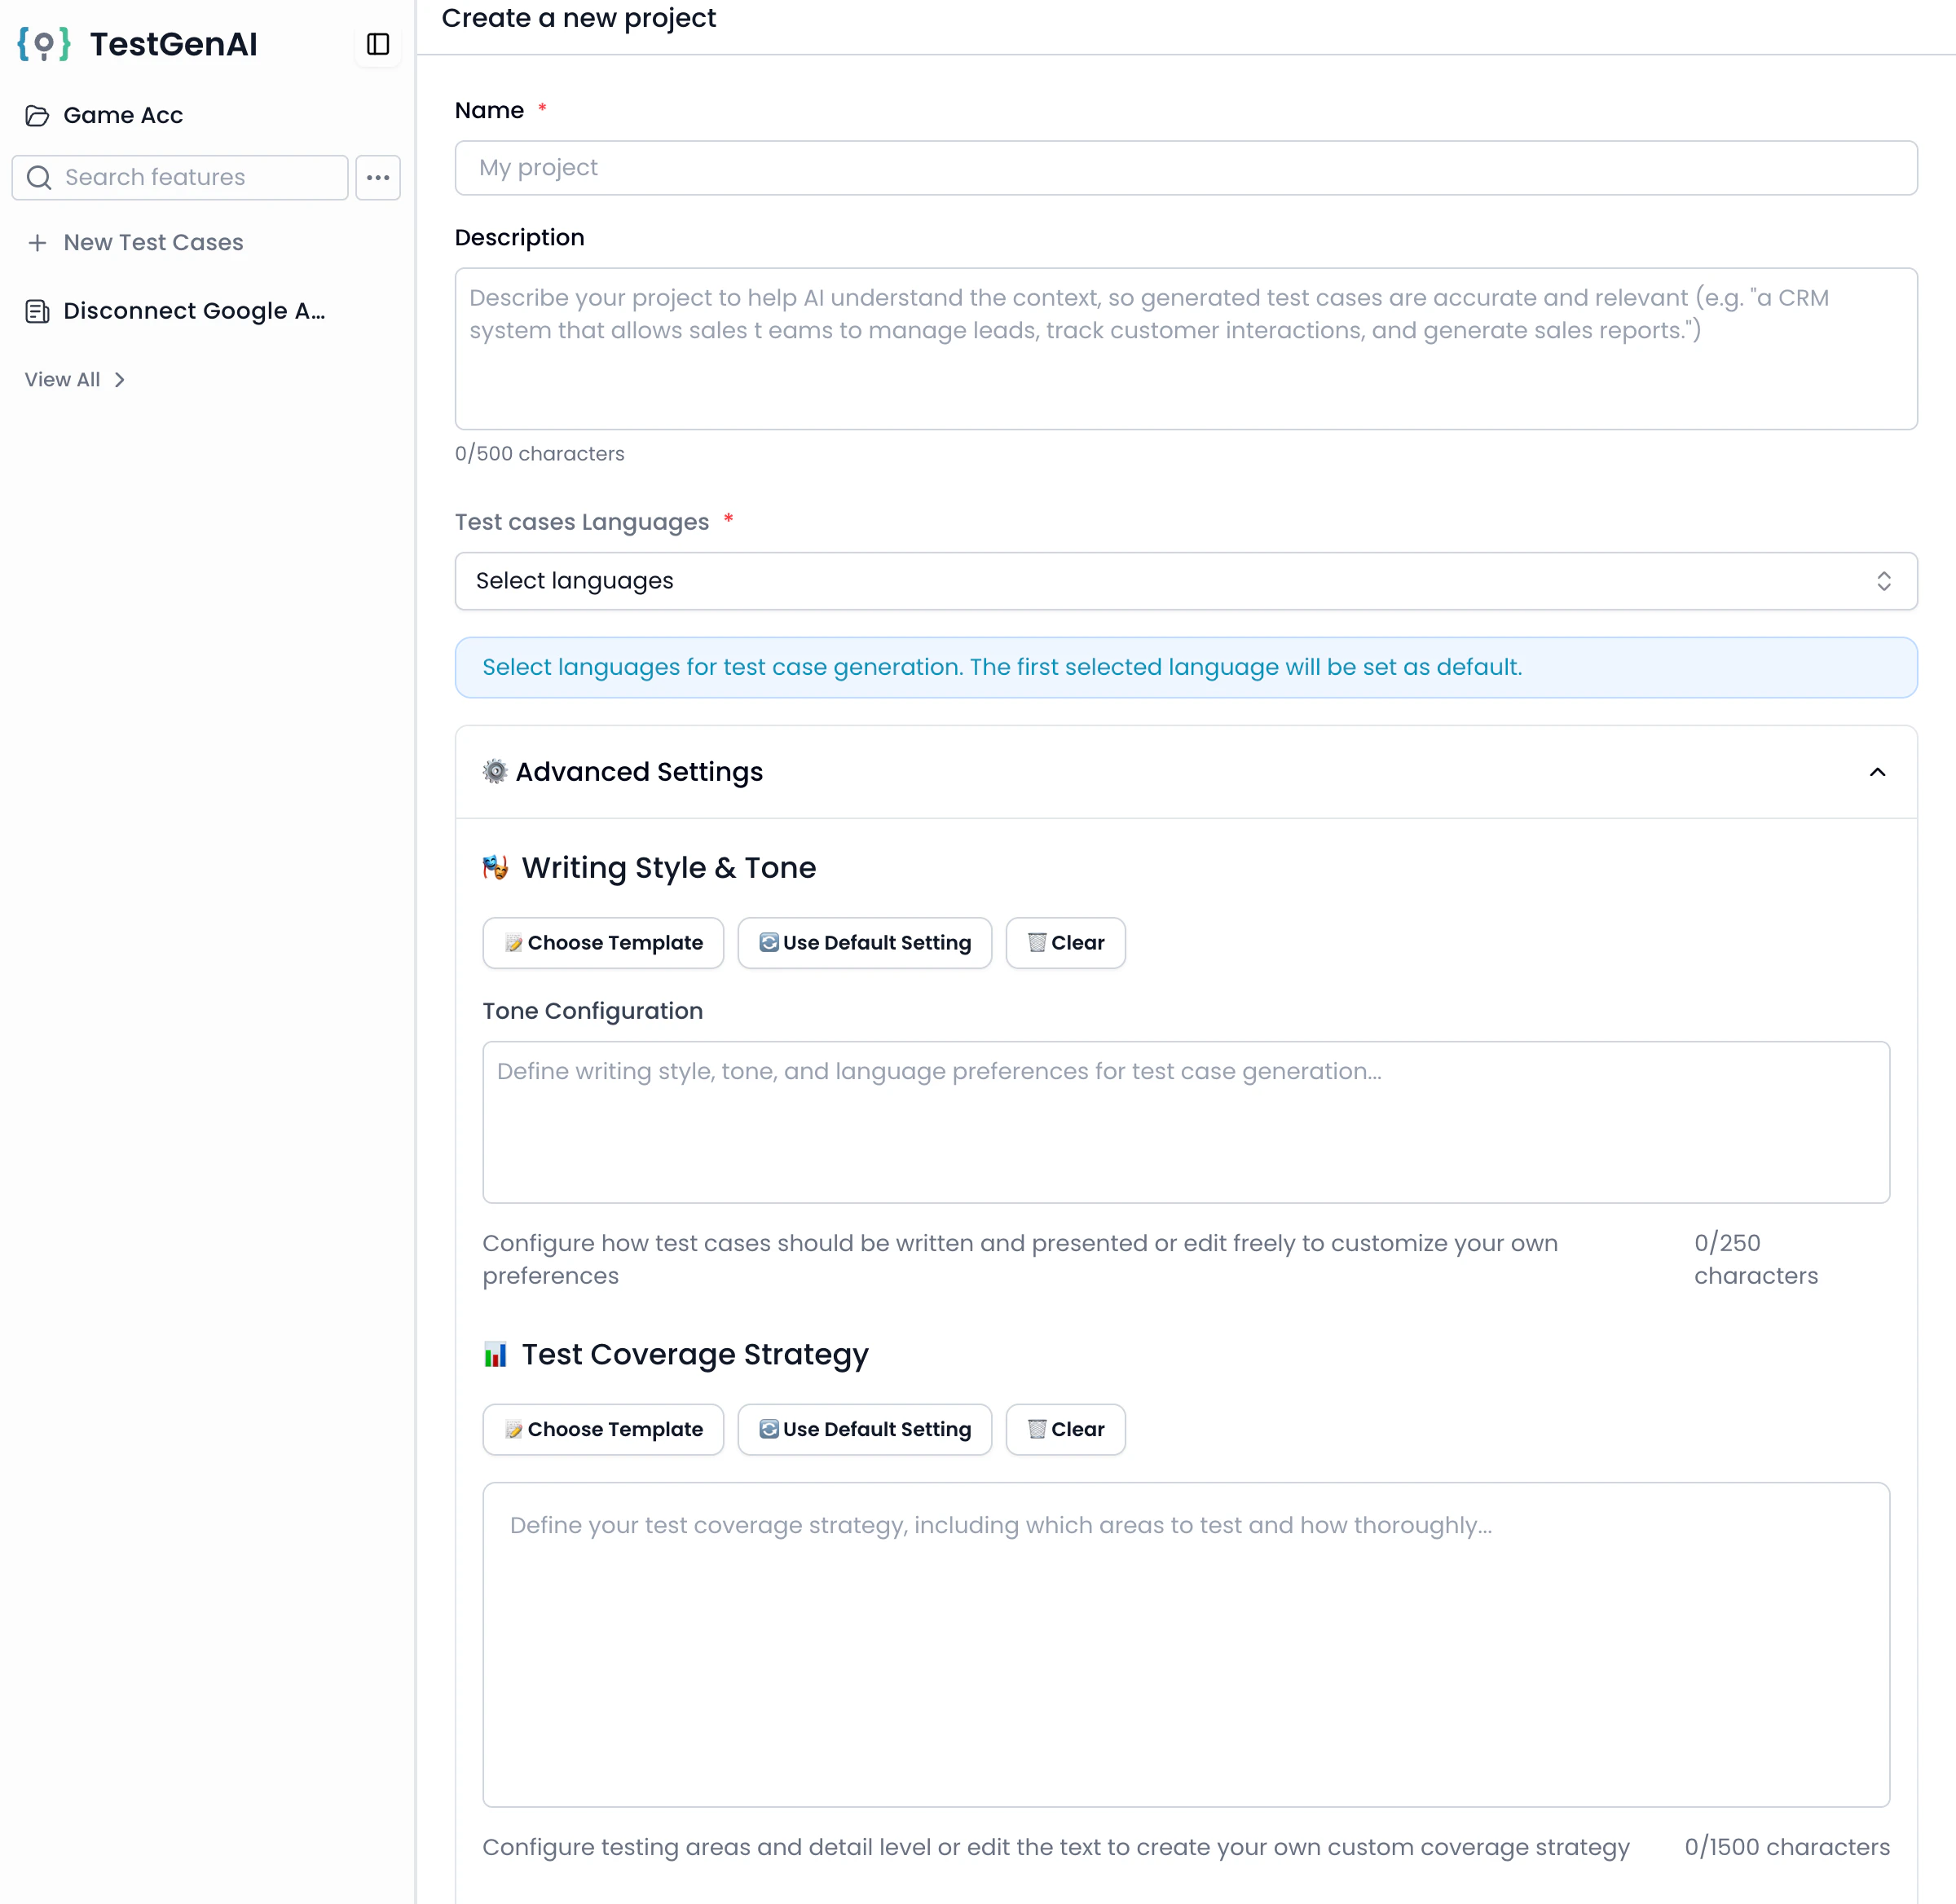
 ### 2.2. Advanced Settings
Expand **Advanced Settings** to configure how AI generates your test cases. If you do not configure these settings, the default configuration will be used.
#### a. Writing Style & Tone
* Define the writing style, tone, and language for your test cases.
* Use templates, default, or specify your own preferences.
#### b. Test Coverage Strategy
* Specify which types of testing to cover (e.g., UI Testing, Functional Testing, Data Validation).
* Use templates or write a custom strategy.
#### c. Priority Levels
Set criteria for four priority levels:
* **Critical Priority**: What makes a test case critical?
* **High Priority**
* **Medium Priority**
* **Low Priority**
For each level, describe when a test case should be assigned that priority.
#### d. Exclusion Rules
* Define what should **not** be tested (features to skip, cases to exclude, etc.).
* AI will avoid generating test cases for these.
#### e. Test Steps Detail Level
* Specify how detailed the test steps should be (high-level steps or fine-grained instructions).
Once all required and any desired optional fields are complete, click **Create** to add your new project.
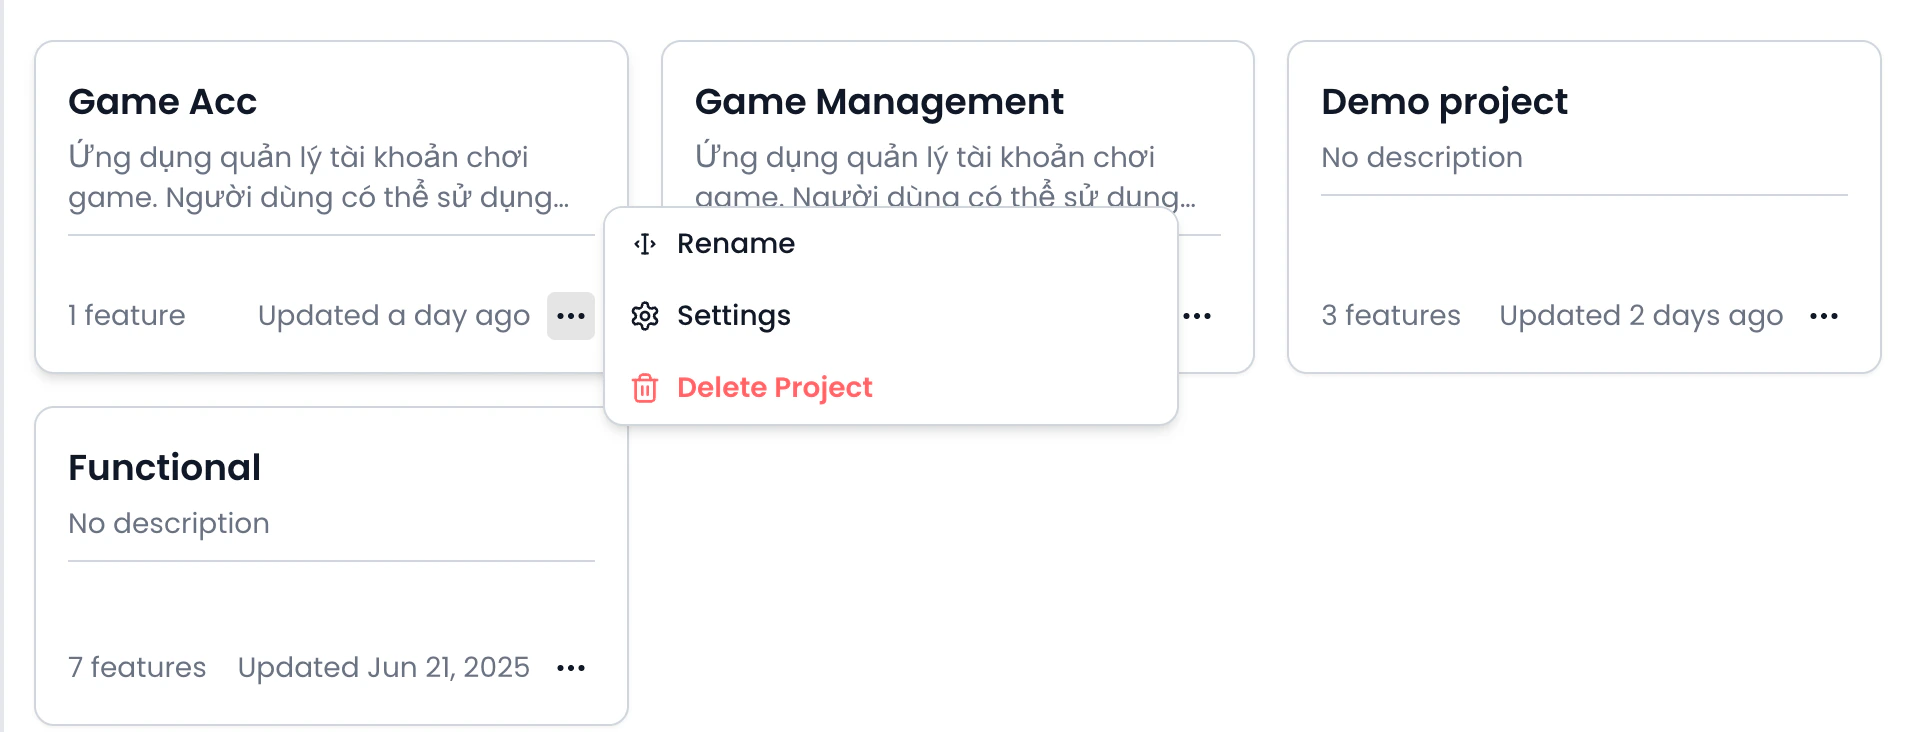
## 3. Viewing and Managing Projects
* Click **View all Projects** in the sidebar to see all your projects.
* For each project card, click the three-dot menu (**...**) to:
* **Rename** the project
* Access **Settings** to edit configurations at any time
* **Delete Project** if no longer needed
### 2.2. Advanced Settings
Expand **Advanced Settings** to configure how AI generates your test cases. If you do not configure these settings, the default configuration will be used.
#### a. Writing Style & Tone
* Define the writing style, tone, and language for your test cases.
* Use templates, default, or specify your own preferences.
#### b. Test Coverage Strategy
* Specify which types of testing to cover (e.g., UI Testing, Functional Testing, Data Validation).
* Use templates or write a custom strategy.
#### c. Priority Levels
Set criteria for four priority levels:
* **Critical Priority**: What makes a test case critical?
* **High Priority**
* **Medium Priority**
* **Low Priority**
For each level, describe when a test case should be assigned that priority.
#### d. Exclusion Rules
* Define what should **not** be tested (features to skip, cases to exclude, etc.).
* AI will avoid generating test cases for these.
#### e. Test Steps Detail Level
* Specify how detailed the test steps should be (high-level steps or fine-grained instructions).
Once all required and any desired optional fields are complete, click **Create** to add your new project.
## 3. Viewing and Managing Projects
* Click **View all Projects** in the sidebar to see all your projects.
* For each project card, click the three-dot menu (**...**) to:
* **Rename** the project
* Access **Settings** to edit configurations at any time
* **Delete Project** if no longer needed
 You can always revisit and **edit** your project’s settings to adapt as your requirements evolve.
> **Tip:**\
> Customize advanced settings for the best AI-generated test cases. You can update project settings anytime.
**Impact Notice**
The updated settings will only apply to new features created after this change
When regenerating existing features, new settings will apply, but previous test cases will remain unchanged
***
You can always revisit and **edit** your project’s settings to adapt as your requirements evolve.
> **Tip:**\
> Customize advanced settings for the best AI-generated test cases. You can update project settings anytime.
**Impact Notice**
The updated settings will only apply to new features created after this change
When regenerating existing features, new settings will apply, but previous test cases will remain unchanged
***