> ## Documentation Index
> Fetch the complete documentation index at: https://docs.testgenai.com/llms.txt
> Use this file to discover all available pages before exploring further.
# Modules
> Modules help you organize related features into logical groups—similar to epics in Agile or categories in a large project. This makes project management clearer and easier, especially for teams with many features.
## 1. What is a Module?
* A **module** is a way to group related features together.
* Each module can represent a business flow, an epic, or a category.
* **Example:**
* The `Authentication` module contains features like login, signup, and forgot password.
* The `Lead` module contains features for lead management.
## 2. Viewing and Managing Modules
**To access module management:**
 1. In your project’s sidebar, click the **three dots** icon next to the feature search bar.
2. Select **Manage modules** from the dropdown.
1. In your project’s sidebar, click the **three dots** icon next to the feature search bar.
2. Select **Manage modules** from the dropdown.
 You will see the list of all modules in your project. You can view the features belong the modules.
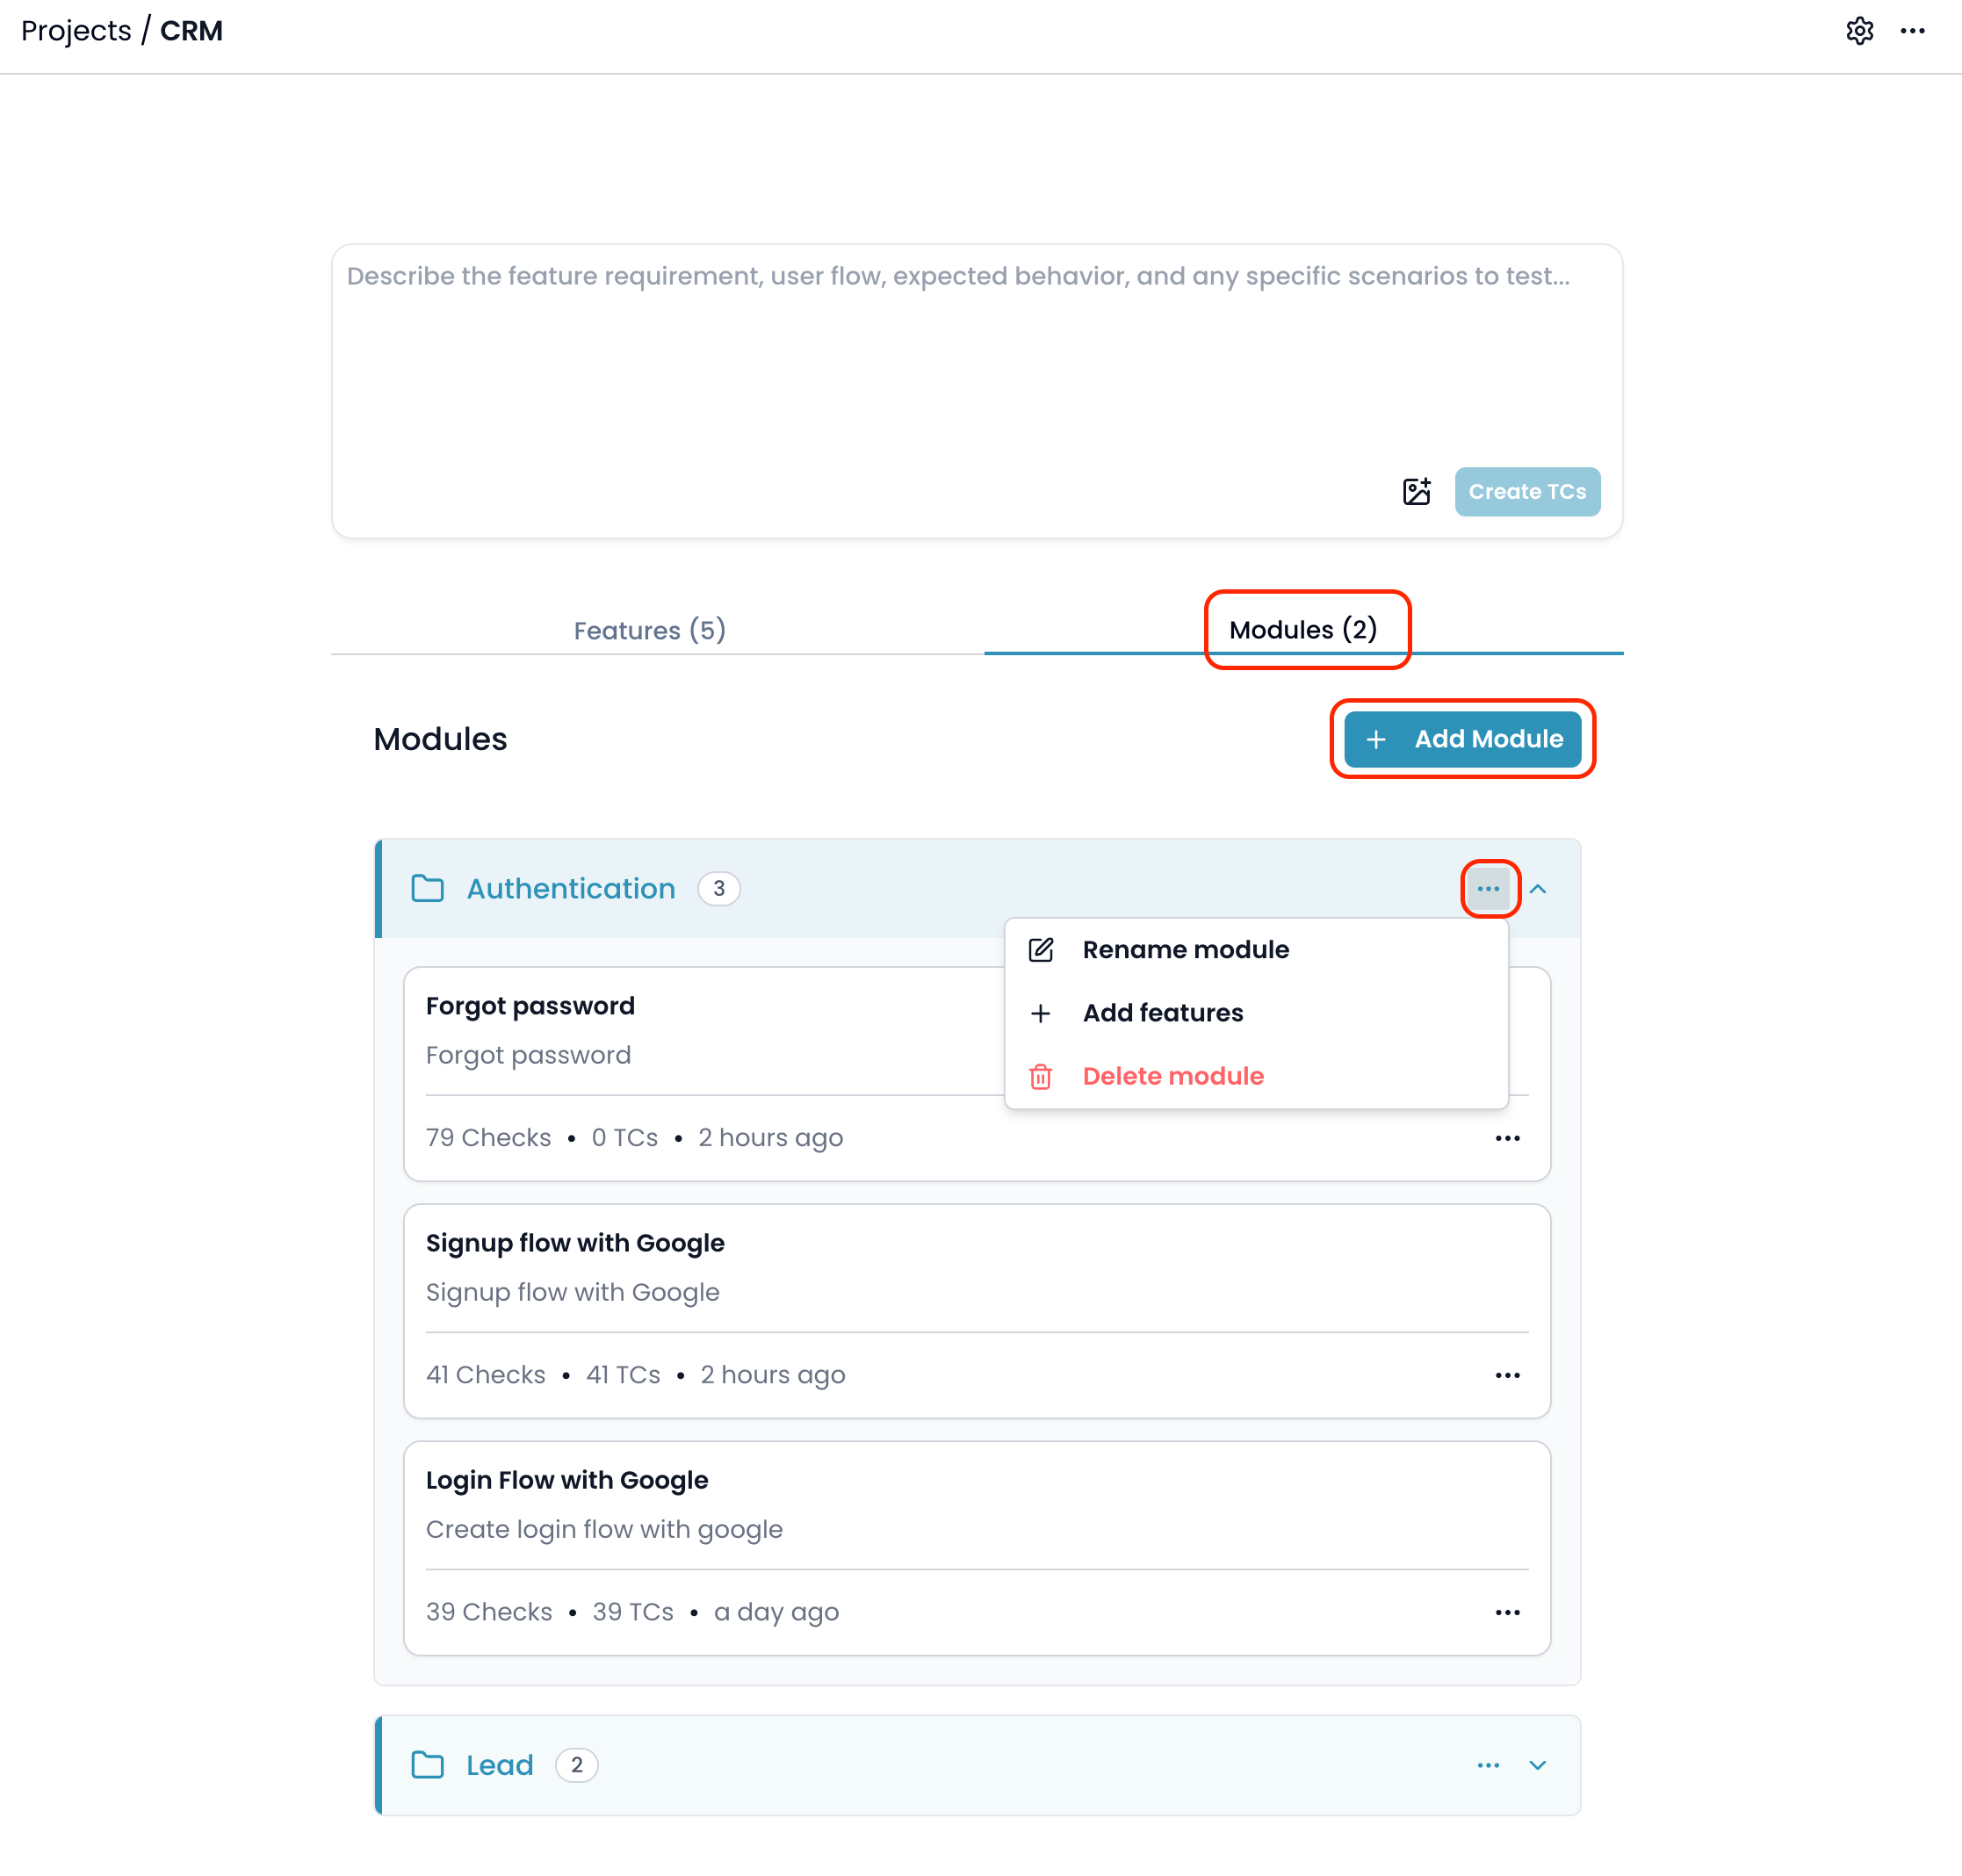
## 3. Adding a New Module
1. In the project screen, go to the **Modules** tab.
2. Click the **+ Add Module** button.
3. The **Add New Module** dialog will appear:
You will see the list of all modules in your project. You can view the features belong the modules.
## 3. Adding a New Module
1. In the project screen, go to the **Modules** tab.
2. Click the **+ Add Module** button.
3. The **Add New Module** dialog will appear:
 * **Module Name** (required):\
Enter a descriptive name for the module (for example: `Authentication`).
* **Description** (optional):\
Optionally describe the module’s purpose and scope.
* **Add Features to Module (Optional):**\
Use the search box to find features and select the ones you want to include in this module.\
You can leave this empty and add features later.
4. Click **Save Module** to create the module.
## 4. Adding Features to a Module
You can add features to a module from two locations:
### 4.1. From the Features Tab in Project Details
1. Go to the **Features** tab of your project.
2. Click the **three dots** next to the feature you want to add.
3. Select **Add to Module**.
4. A popup will appear. Select one or more modules and click **Add to x module(s)**.
* **Module Name** (required):\
Enter a descriptive name for the module (for example: `Authentication`).
* **Description** (optional):\
Optionally describe the module’s purpose and scope.
* **Add Features to Module (Optional):**\
Use the search box to find features and select the ones you want to include in this module.\
You can leave this empty and add features later.
4. Click **Save Module** to create the module.
## 4. Adding Features to a Module
You can add features to a module from two locations:
### 4.1. From the Features Tab in Project Details
1. Go to the **Features** tab of your project.
2. Click the **three dots** next to the feature you want to add.
3. Select **Add to Module**.
4. A popup will appear. Select one or more modules and click **Add to x module(s)**.
 ### 4.2. From the Sidebar
1. In the sidebar, click the **three dots** next to the feature.
2. Select **Add to Module**.
3. A popup will appear. Select one or more modules and click **Add to x module(s)**.
### 4.2. From the Sidebar
1. In the sidebar, click the **three dots** next to the feature.
2. Select **Add to Module**.
3. A popup will appear. Select one or more modules and click **Add to x module(s)**.

 ## 5. Removing a Feature from Module
1. In the project screen, go to the **Modules** tab.
2. Click the **three dots** on the feature you want to remove.
3. Select **Remove from Module** from the dropdown menu.
## 5. Removing a Feature from Module
1. In the project screen, go to the **Modules** tab.
2. Click the **three dots** on the feature you want to remove.
3. Select **Remove from Module** from the dropdown menu.
 The feature will be removed from the selected module, but will remain available in your project and can still belong to other modules.
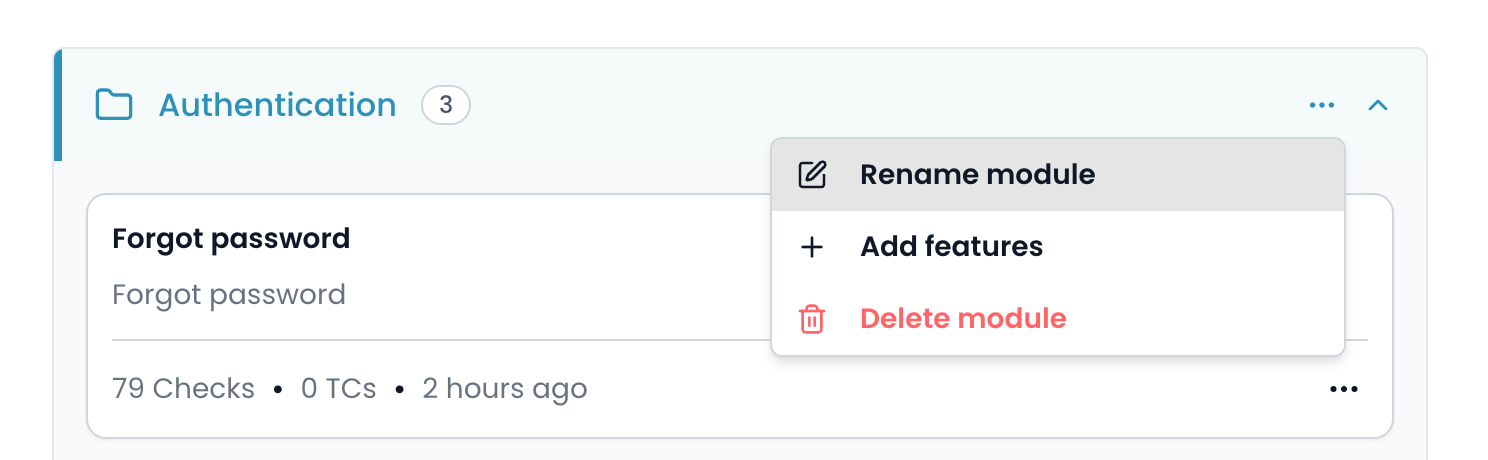
## 6. Editing a Module
1. In the modules list, click the **three dots** next to the module you want to edit.
2. Select **Rename module** (or **Edit module**).
3. The **Edit Module** dialog will appear:
The feature will be removed from the selected module, but will remain available in your project and can still belong to other modules.
## 6. Editing a Module
1. In the modules list, click the **three dots** next to the module you want to edit.
2. Select **Rename module** (or **Edit module**).
3. The **Edit Module** dialog will appear:
 * Edit the module name and/or description as needed.
* Click **Update Module** to save your changes.
* Edit the module name and/or description as needed.
* Click **Update Module** to save your changes.
 ## 6. Deleting a Module
1. In the modules list, click the **three dots** next to the module you want to delete.
2. Select **Delete module**.
3. A confirmation dialog will appear:
## 6. Deleting a Module
1. In the modules list, click the **three dots** next to the module you want to delete.
2. Select **Delete module**.
3. A confirmation dialog will appear:
 * Click **Confirm** to permanently delete the module.
* Click **Cancel** to abort.
> **Note:** Deleting a module does **not** delete the features inside it. The features will remain in your project.
**Tips:**
* A feature can belong to multiple modules.
* Use modules to organize your project by business flows, epics, or main categories.
* You can edit, add, or delete modules at any time.
## 7. Filtering Features by Module
You can easily filter the feature list in your project by module, allowing you to focus on just the features relevant to specific business flows, epics, or categories.
### 7.1. How to Filter by Module
1. In your project sidebar, click the **three dots** icon next to the feature search bar.
2. Under **Filter by modules**, you’ll see a list of all modules in the project.
* Click **Confirm** to permanently delete the module.
* Click **Cancel** to abort.
> **Note:** Deleting a module does **not** delete the features inside it. The features will remain in your project.
**Tips:**
* A feature can belong to multiple modules.
* Use modules to organize your project by business flows, epics, or main categories.
* You can edit, add, or delete modules at any time.
## 7. Filtering Features by Module
You can easily filter the feature list in your project by module, allowing you to focus on just the features relevant to specific business flows, epics, or categories.
### 7.1. How to Filter by Module
1. In your project sidebar, click the **three dots** icon next to the feature search bar.
2. Under **Filter by modules**, you’ll see a list of all modules in the project.
 ### 7.2. Filtering Behavior
* **No modules selected:**\
All features in the project are displayed.
* **One module selected:**\
Only features that belong to the selected module are shown.
* **Multiple modules selected:**\
All features that belong to any of the selected modules are shown together.
You can check or uncheck modules at any time to refine your view.\
This makes it easy to focus on specific areas of your project, such as only seeing features for “Authentication” or for both “Authentication” and “Lead” at once.
### 7.2. Filtering Behavior
* **No modules selected:**\
All features in the project are displayed.
* **One module selected:**\
Only features that belong to the selected module are shown.
* **Multiple modules selected:**\
All features that belong to any of the selected modules are shown together.
You can check or uncheck modules at any time to refine your view.\
This makes it easy to focus on specific areas of your project, such as only seeing features for “Authentication” or for both “Authentication” and “Lead” at once.